
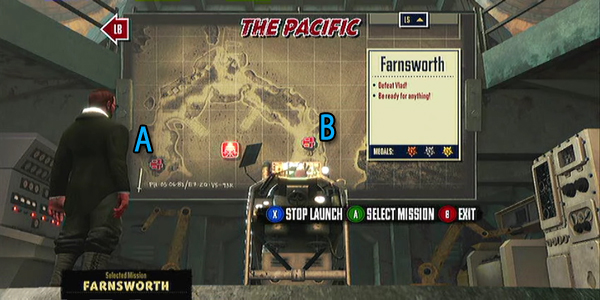
Trenched Pacific Farnsworth map and boss guide

Featured in this guide
Gungnir, Repair Crane, Tripod Legs
Double Fine’s quick tips
Map layout
- Defeat Vlad!
- Be ready for anything!
Recommended Trench loadout
- Moxie (Note: the Sunglasses hat or Ripped shirt satisfy this condition; no idea if it means anything)
XBLAFans gold medal advice
XBLAFans recommended loadout
- Karlsson Chassis
- Gungnir x2
- Machine Gun Turret and Repair Crane Emplacements
Getting gold: Defeat Vladamir Farnsworth within 200s (3 minutes and 20 seconds).
This boss is really fun to run around in, to dodge the attacks of, to play it like a Devil May Cry game, but the best way to beat Farnsworth quickly is to sit in the back with the most powerful weapon in the game and a repair crane and enjoy the fireworks. If you’re quick enough, hit Farnsworth’s red spot the very second it starts up with two Gungnir shots and Tier 1 is done. After that, setup camp in the back (on that high rock next to the huts where the mission started) and entrench. Farnsworth will fire his electromagnetic cannon of death which somehow spews scrap all over the place. Take the hit and absorb the scrap, then place a repair crane on the rock directly next to you (not too far or it won’t work) and a machine gun turret to keep intermittent tubes off of you.
Tier 2 will require quick eyes and quick aim, the moment the red flashes take the shot, both barrels blazing then wait for the next opportunity. The first two tiers should go quickly, just be sure to get the first shot off on Tier 2 when it emerges from the water. Tier 3 will by far be the most difficult; not because you’re faced with massively damaging attacks or tons of tubes, but because you have to be super quick. Red tube-sacks will descend from Farnsworth’s body after each laser attack and are the key to destroying him. You must destroy the first one the moment you can or there’s a good chance you won’t get the gold here. After destroying that sack, you should be able to get the last two after the next laser firing without one in between. Speed and accuracy is key here, so bring your A-game and two Gungnirs and you should be good to go. Note: after the cutscene before Tier 3 starts, you will be un-entrenched if you were so before! Why is unclear, but be sure to re-entrench to gain the quickload effect.
Boss breakdown
Tier 1: The smallest dome of Farnsworth’s massive tube, it fires red bursts of energy at the poles placed around the shore to activate them, causing damage to any trenches caught in their area of effect.
Vulnerability: Normally the weapon area on Farnsworth is shielded, when unshielded it glows red- shoot it then.
Tier 2: Slightly more dome-age here, and three more shielded areas. Again firing the red bursts of energy at the poles to begin with, then following up with a small aimed laser- after the thin laser, which clearly points out the area of affect, a large, painful laser is emitted from Farnsworth’s eyes. This Tier comes with Aerial tubes.
Vulnerability: Normally the weapon area on Farnsworth is shielded, when unshielded it glows red- shoot it then. Only difference is now there are three areas to shoot.
Tier 3: Full frontal Farnsworth this time, bringing with it the previous red-glowy-ball attacks activating the coils, the guided laser, and a painful close-range smashing attack with the beast’s new limbs. After the second tube-sack-dropping, the electromagnetic space cannon will fire again. Expect more aerials.
Vulnerability: Tucked under Farnsworth are three tube sacks. Then blue, they are invulnerable, but as with the previous tiers when he goes to activate the red coils, they will become exposed and drop to just-above the water level. Take them out then.
Between Tiers: Farnsworth fires the massive electromagnetic cannon from space, so watch the ground for attack points and pick up the massive amount of scrap that comes with the blast.
Dos and don’ts
Do
- stare directly at the place where Farnsworth will be at all times
- place the repair crane quickly before Farnsworth comes back
- entrench/quickload
Don’t
- miss
- move
Click here for more Trenched Walkthroughs and tips and Tricks