
Skulls of the Shogun – XBLA Fans Guide – Region Two
Hello and welcome to the XBLA Fans guide to the second region of Skulls of the Shogun (Skulls.) On this page, you’ll find a walkthrough to each of the levels in this region, as well as how to win all of the gold skulls for each level. Enjoy!
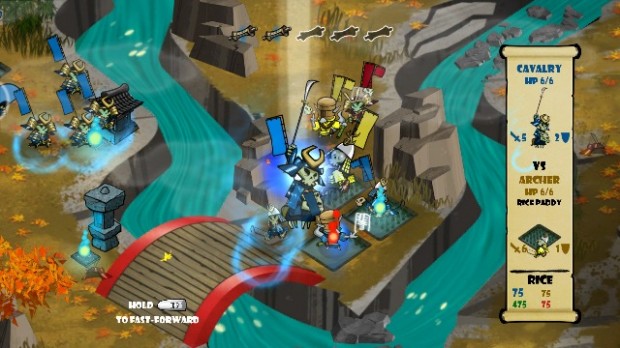
Region Two – Level 1 – Sakura’s Solace
Round 1
Following the cut scene which introduces Sakura and explains about the haunting of fox monk shrines, do as suggested and move your uppermost cavalryman North to the fox shrine to haunt it. Then, use your closest archer to haunt the summoning shrine, the two infantry to haunt the closest rice paddies and your other cavalry to haunt either of the rice paddies which are slightly further away.
Round 2
The enemy is likely to have advanced through the middle with his cavalry. Use your forwardmost cavalryman to flank the enemy cavalry, attack the enemy archer and then hide in the bamboo just to the right of the central area. Although he seems vulnerable, he won’t be a priority target for the enemy on the next turn. Now bring up the archer from the summoning shrine and place him on the central rice paddy (which your cavalry was occupying) and attack the enemy cavalry for damage. Bring up the closest infantryman to finish the enemy cavalry. Now use the fox monk and the cavalry to the north to capture the two rice paddies.
What happens next will unfortunately vary from one game to another. This guide is written with the hope of winning the Gold Skull for not losing a unit, so if you do, you may wish to restart. We found that by following the instructions described above, the enemy would commonly attack the friendly cavalry with his archer (receiving damage in the process due to close range) and push his own cavalry through the middle to attack the friendly archer. He will then attack a friendly infantryman with his own and haunt two locations – this should leave you with everyone alive (albeit damaged.)
Round 3
If all the above goes to plan, you should be able to finish both the enemy archers with your right hand side cavalry and the damaged archer in the centre. Do so, moving the cavalry to the bushes as far down in the bottom right of the map as you can – make sure this is as far as possible, because the enemy general may awaken next turn and attack. Move your damaged archer unit down to the bottom, central bamboo where he should be safe. Now move up your other archer and attack anything in range (or nothing if that is the lie of the land.) In the centre, use your full strength infantryman to attack the enemy infantry (who is likely to be haunting) and then eat a skull with the other (who should be damaged.)
Round 4
If the enemy general was awakened and came for your cavalry, simply move him as far left as possible behind the rocks. If not, capture the fox shrine in the bottom right. Use both of your archers (who are both now likely to have taken damage) to finish the enemy cavalry and then withdraw them respectively to the rice paddy/shrine furthest from the enemy. Depending on how the enemy infantry (and your own) are looking, either consume skulls or attack.
Round 5
Again, things need to have gone to plan here, but if so, you will be able to use your archers to take out at least one enemy infantry. You may have one badly damaged infantry who has eaten two skulls, if so feel free to eat one more and then once Demon mode is activated- use the extra turn to eat another. Basically, the central situation should be that you have 2 full (or near full) strength infantrymen and 2 archers sat on fields recovering health. The enemy should have 1-2 infantry (at most) and his general, who will likely have haunted last turn. Use your last order to make sure your cavalry (at risk from the general) moves to a safe spot.
Round 6
From this point forward you’ll have to play it by ear. If you’re going for all the Gold Skulls, then you need to keep any unit which can be killed by the general away from him. You’ll also need to make sure you capture the enemy summoning shrine or else you might end up with 1 or 2 surprise infantry to deal with. Lead the general around the map and be careful, whilst at the same time, try to capture the enemy rice paddy’s as quickly as possible. Bear in mind that it’s extremely difficult to do all three of the skulls in one go, so feel free to focus on winning just one or two at a time, especially if you lose a unit late in the game.
Gold Skull 1 – Defeat the level with 2 monk allies still alive
This one can be won alongside either of the other two quite easily. Just capture the two monk shrines and don’t worry if the enemy gets to one first – you can always reclaim it from them later.
Achievement Note – if you can capture the enemy monk shrine whilst he has a monk on the field, you will unlock an achievement. Don’t risk the skulls to do this though, as you will have a 99% chance of getting this achievement on the next level.
Gold Skull 2 – Beat level with at least 1000 rice
This one is insanely hard to achieve alongside the 3rd skull because it requires a risky strategy. You’ll need to capture as many fields as possible quickly and minimise your spending. If you follow the guide, you’re unlikely to need any further troops, but even getting to 1000 rice is tough.
Gold Skull 3 – Beat level without losing any units
The guide is built around this skull which is insanely tough. There is a lot of chance in Skulls and many things don’t or won’t go as described here, or as you might think. You’ll have to use a bit of trial and error to win this one, so try saving after every turn, using multiple saves and seeing which combination of strategy and luck wins out.

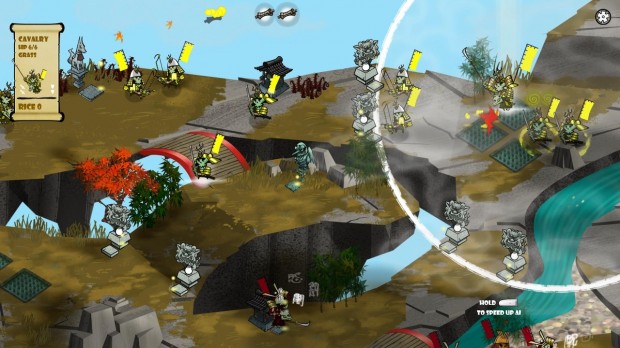
Region Two – Level 2- Pink Pursuit
Round 1
At the start of this map, you’ll notice two distinct paths to the left and right. We’re going to ignore the right. Examine the two cavalry units and see which one can reach the summon shrine on the left edge of the map. Now select the other. Send him to try and knock the enemy archer on the left off the cliff – he will have a chance to hit, but it won’t be certain. If he does, great – send the other cavalry to the shrine. If not, use the cavalry who can reach the archer easily to finish him. Bring everyone else around the corner.
Round 2
Bring Akamoto up to eat the archers skull, then capture one of the fields. Use your own archer to capture the other field and bring the infantryman up behind. With the cavalry, edge them just into attack range of the haunting enemy infantry and attack with both, before withdrawing them behind the thorns. If you’re lucky and score 2 hits, the enemy will only recover half of that damage on the next turn.
Round 3
At the start of this turn, the enemy will be reinforced from your rear. We’ve generally found that depending on positioning, you can kill one of the two enemy infantry on the paddy fields and damage the other, just kill one, or sometimes kill both. This depends upon Akamoto’s positioning, so check it first. If he can reach the closest infantryman and attack twice, do so to kill him. Then use your archer to attack the second. Send both cavalry around the thorns to kill him and then end their turn in the bushes slightly to the right.
Round 4
With luck (and more than likely) the enemy will waste his turn piling 5 of the units who reinforced from the south after you, instead of attacking with those units you must pass through. Good. Now, bring up your archer a little and attack the infantryman on the right hand side. Using Akamoto, eat both of the skulls on the rice paddies, activating demon mode. Now use his final action to finish off the infantryman. Use both of your cavalry to attack and kill the enemy archer behind and then use your infantryman to move up and capture one of the rice paddies.
Round 5
Depending upon what happens, try to capture the fox shrine with a cavalryman. Finish the enemy infantry with archer/cavalry or infantry and use Akamoto to attack and kill one of the enemies units approaching from the north if possible. If not, don’t worry too much as they won’t be able to finish him and there will be lots of skulls to eat.
Round 6
The enemy will now probably to a mixture of things to attack Akamoto, move up their own forces or capture various paddies etc. In any case, Akamoto will probably be able to eat a skull, kill at least one cavalry and then attack the archer for big damage. Use your own archer to finish him, then move the fox monk and the cavalryman inside the thorn barrier. Eat skulls etc as appropriate, depending upon the kind of force you want. There should now be a single enemy infantry on the bridge and then a load of units around the map who are posing little or no threat.
Round 7 and beyond
If you have Akamoto kill the last infantryman and cross the bridge, you will end this map with 2 Gold Skulls (general as a demon and without losing any units) but where is the fun in that? Instead, kill the infantryman and have everyone else eat any skulls and heal, then get ready to defeat 25 enemy units (without losing any) and make your stand between the thorns, just a little back so that you can knock the enemy into them for 1 additional damage. If you have the rice and the time, feel free to call in 1 or 2 new units from the summon shrine before the enemy overwhelm it.
Gold Skull 1 – Beat level without losing any units
Just follow the guide for this one, it’s surprisingly easy. Remember that to do it, you can’t have your fox monk defeated through the enemy capturing his shrine either. If you find this too difficult, try doing the level without every bothering to capture the fox shrine – I find that there are so many skulls about at the end that healing isn’t totally neccesary.
Gold Skull 2 – Defeat the level with your general as a demon
Again, just follow the guide – this will happen fairly early on.
Gold Skull 3 – Defeat 25 enemies
This one isn’t exactly tough, but you do need to think carefully about it. Probably worth a separate playthrough, as it’s easy with a fox monk and hard without.
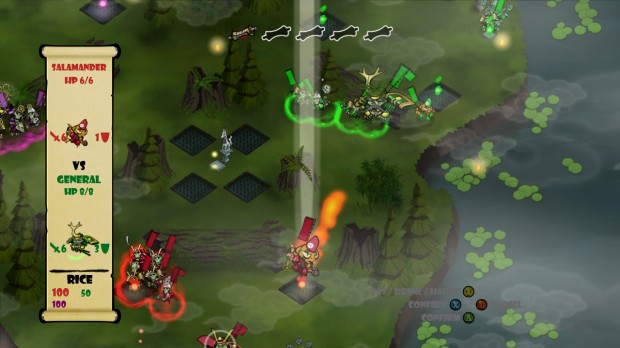
Region Two – Level 3 – Potion Panic
Round 1
The first turn or two of this level are pretty much a land grab. Send a cavalry and an infantry unit to the south shrine and rice field to capture them. Send the same to the top, towards the fox shrine and the nearest rice field. Send your archer through the middle.
Round 2
Purchase an archer at the bottom shrine, then have him and the archer in the centre (who is likely to have been attacked) kill the threatening cavalryman in the centre. Do it in the right order and there will be no counter. Then at the bottom, an enemy archer is likely to have moved into range and may have drank a red potion. Either way, kill him with infantry and cavalry.
Round 3
This turn could go a number of ways. It’s quite likely that up at the top, you will be able to take out (or severely damage) the enemy infantryman with your cavalry and infantry combo. At the bottom, you should be able to defeat at least one enemy cavalry and damaage the remaining one to keep him away from your recently acquired archer.
Round 4 and beyond
This is where this level will become a little bit too random to continue with a straight up guide. Here is what you need to know – all the achievements can be done in one go, but you need to be very careful. The easiest one is of course, to allow the enemy to retain 4 units. Keep the pressure on the general once he is unleashed, but don’t kill him. He will heal 2 HP per turn and can kill any base unit in one attack – so with 2 attacks he is deadly. Hunt around for skulls to create at least 2 demons and if need be, sacrifice weak or unneeded units to keep the enemy general away from Kurosawa. The knockback skull will happen on it’s own.
Gold Skull 1 – Beat level with at least 4 enemy units alive
This is a weird one, because actually this is an incredibly easy level to win if you just cut off the enemies ability to reinforce. With that in mind, you can therefore control his reinforcements to a certain extent by allowing him access to 1 shrine. Fox monks count as well, so with 2 fox monks and 2 infantry around, you should be able to beat the enemy general as long as you can do it in a single turn – if not he will receve up to 8 pts of healing. It’s a tough one which isn’t actually fun if you want to get all skulls at once, but if you’re happy to claim them one at a time (ie ignoring the other 2 skulls) then just rush the general early with at least 1 demon, a couple of archers and your own general.
Gold Skull 2 – knockback at least 3 enemies into thorns
You should be able to do this just in normal gameplay whilst defeating the enemy army. It’s in your interest to cause maximum damage, so just position your troops well and go for it.
Gold Skull 3 – beat level with at least 2 demon allies alive
This one is either hard or easy depending on how you play the level. If you’re trying to rush the enemy general, you’ll be lucky to achieve it because of how few skulls will drop. On the other hand, if you eradicate the enemy troops, cut the supply lines and power up to defeat the general you should have no problems.
Region Two – Level 4 – Guardian Gardens
Round 1
This is probably the easiest boss encounter in the whole game, not to mention one of the most fun levels overall. It’s large, has lots of resources and is all about big armies. Anyway enough of that. Send an archer and a cavalryman each to the left and right paddy fields. You can advance one of the left hand infantrymen forwards as far as he will go.
Round 2
The enemy will either have moved into the field areas with cavalry and through the centre with a combination of archers and infantry or he will have advanced more or less everything through the centre, possibility attacking your infantry with his cavalry. Use your archer and cavalry on each side to quickly defeat the enemy cavalry on each flank if they came, or if not just haunt stuff. Advance the second left hand infantryman up in support of the first and/or attack and defeat the enemy cavalry.
Round 3
What you do here really depends on what the enemy has done. You’ll either be able to kill something on either flank with your archer/cavalry combo, or you’ll be killing at least one archer or cavalry in the centre. This can be a bit tricky as the enemy could overwhelm you, but in our experience the enemy forces tend to split, with the first attack comingat your exposed infantryman and any follow up coming down the side towards Kurosawa. In any case, you will want to get 2-4 infantrymen into play against the enemy and you can also support the attack with your right hand archer, depending on where he and the enemy units are located.
Round 4
You’ll notice now that the enemy has very few units or rice left and that his paddy fields are nearing depletion, whilst you still have loads. The battle in the centre is likely to continue but you may have reached this point with the loss of perhaps only 1 infantryman. That would be ideal and you should notice that enemy skulls (archers and cavalry) are helping prop up your force.
Round 5
Around this time, you’ll notice the enemy monks coming forwards. If you can, sneak the right hand cavalryman in behind them and claim the right hand shrine – that takes care of a Gold Skull and the achievement for doing so, just in case you missed it earlier.
Round 6 and beyond
Around about round 6, if you have followed this guide, the enemy will be all but out of rice and you will have bought maybe 1 or 2 units at most if any. The enemy general is likely to awaken (especially if you captured a monk shrine) and you’ll need to think about using Kurosawa to defeat him and claiming the Gold Skull. Chances are, the centre of the field will have at least 3 skulls which, once awakened, Kurosawa can claim in only 2 turns. If you can do this before the enemy does the same, then it makes it a dead cert. At some point, whilst planning this strategy, you’ll want to build a cavalry unit on the left (or send one from somewhere else) to claim the second monk shrine, because that takes care of the third Gold Skull. As a side note, remember that wherever the enemy monks drop, they will drop 3 cleansed skulls for either you or the enemy – timing is everyting.
Gold Skull 1 – Beat level with no enemy monks left alive
This one is easy – just follow the guide and use cavalry to get behind the enemy and claim those monk shrines. That is a LOT easier than killing the super tough, buffed up monks on this level.
Gold Skull 2 – Defeated enemy general with your general
Another easy one and always the easiest way to take down the enemy general. Just wait for the right moment, awaken Kurosawa, turn him into a demon and go toe-to-toe with the enemy. Do this after the fox monks are gone and you will be in with a much better chance – if not, they will just heal him.
Gold Skull 3 – Defear at least one monk by haunting its shrine
Even if the rest of the level were not easy anyway, this Gold Skull is still quite attainable. Just head down the right flank, wait for the enemy to advance through the centre and send your cavalryman in there. You can get from the right hand shrine to the fox monk shrine in just one move, which makes it the perfect location for a snatch and grab.
Back to the full Skulls of the Shogun XBLA Guide