
Skulls of the Shogun – XBLA Fans Guide – Region Five
Hello and welcome to the XBLA Fans guide to the fifth and final region of Skulls of the Shogun. On this page, you’ll find a walkthrough to each of the levels in this region, as well as how to win all of the Gold Skulls for the area. Enjoy!
Please note that to get the most achievement points possible from Skulls, you’ll need to play on normal difficulty, which is the default anyway.![]()
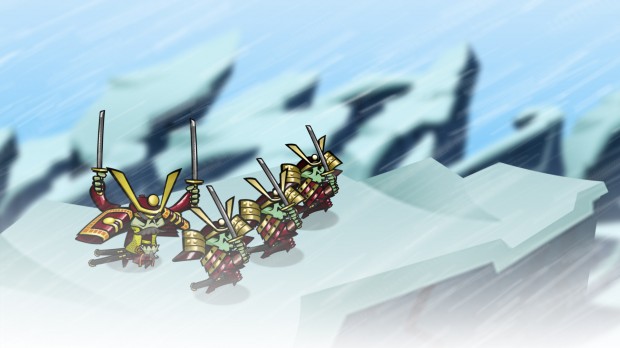
Region Five – Level 1 – Glassy Glacier
This is quite an easy level and all three Gold Skulls can be done in one playthrough, but the second one (knockback 5 enemies over ledges) does rely to some extent on chace, so don’t be too disheartened if you only achieve the first two.
Round 1
Send the cavalry forward to claim the summon shrine and the rice field which is on an island of snow ahead. Move one infantryman down towards the mixed monk shrine at the bottom and then move two archers downwards. This guide will be aiming for all three Gold Skulls, so remember that at no time should you attack with any unit except Akamoto. Leave him sleeping/meditating this turn.
Round 2
What you’re aiming for is to drawn the enemy around the bottom of the central rock formation, so that Akamoto can knock them off the ledge at the bottom left of the map. The only units which you want to send around the top are the cavalry, as its useful (both for the Gold Skull and tactically) to claim the shrines and rice fields as and when you can. On this turn, send both the cavalry around the top, towards the mixed monk shrine – there will be at least 1 or 2 enemies in the middle and the enemy cavalry will also have headed for this shrine, so be canny in later stages. Send the archers down and use your last order to use the infantryman who moved last turn onto the bottom left monk shrine.
Round 3
Things will start to go there own way from here, so this is the last turn which we can really walk you through. Choose a fox monk from the shrine first thing. Your cavalry will be coming under threat at the top, but if you can just ignore and bypass the enemy (perhaps by steering them to the furthest top right corner) you might get away with it. Just check out what enemy units are where and try to keep them out of danger – sacrifice one if need be. Wake Akamoto this turn and have him head for the bottom tip of the central ‘snow island.’ Have the fox monk head for a rendezvous with him here on the next turn, and bring other units that way too to act as meat shields.
Round 4 and beyond
What happens next is down to you, Akamoto and chance. Try to keep Akamoto just behind the rock formation so that archers can be drawn into line of sight. Akamoto will take plenty of damage, so keep the fox monk close and eventually, if you’re cavalry are lucky, you will be able to summon a second one from the top right shrine. Keep plugging away, using the cavalry to steal rice fields where you can and eventually the summon shrine down near the enemy start point. You might not get all 5 enemies knockback over the edge, but you will more than likely be able to get the other Gold Skull with relative ease. Try to get Akamoto and one or both fox monks into demon mode for a significant advantage on this one.
Gold Skull 1 – Beat level owning all shrines
This one is very easy. All you need to do is wait until the enemy has very few units and make sure you take the time to capture the shrines. There are 4 in total, located more or less in each corner.
Gold Skull 2 – Knockedback at least 5 enemies over ledges
This is a tough and fairly random Gold Skull to get, so don’t worry if it takes a second playthrough without having to rely solely on Akamoto. Just use the two cliffs at the top right and bottom left of the map to do it a second time if you need to.
Gold Skull 3 – Didn’t attack with any unit but your general
This one is moderately tough, but entirely achievable. Just follow the guide above and keep Akamoto safe whilst you wear down the enemy with his attacks the counters of your other units. At the end of the level, you will likely have Akamoto and one or both fox monks in demon mode, which will have helped a lot. It may also be useful to keep one or two infantry alive, as the enemy will often waste attacks on them.
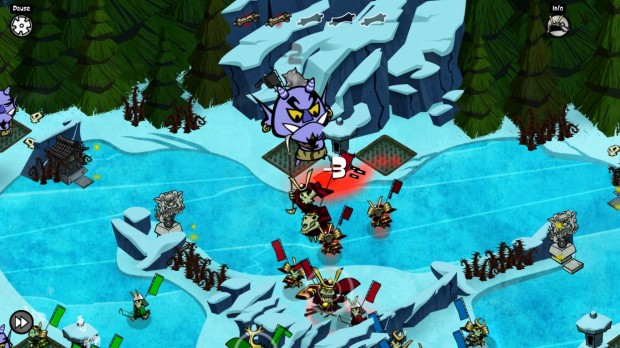
Region Five – Level 2 – Avalanche Alley
For this level, you will basically need to decide beforehand if you want to go for the speed Gold Skull, or the other two. We haven’t found a way in which all three can be achieved in a single playthrough, although it is probably possible with a little luck.
Round 1
Send a cavalryman to each of the closest cleansing shrines – don’t worry, the one on the right doesn’t count as being ‘on the ice.’ Then send up a couple of archers and one infantry to take the monk shrine and the two rice paddies.
Round 2
Choose a salamander monk for this one, as his range attack is key. Send the cavalryman on the right hand cleansing shrine up to the monk shrine on the closest section of snow just above your start point. Send the other cavalryman up to the same place to take the rice field. Your whole strategy will involve the starting location and this piece of snow, plus maybe the one just left of it (around the rocks) but you needn’t extend further to get the two Gold Skull we’re after on this playthrough.
On this turn, you’ll more than likely be able to bring the salamander monk and 1-2 archers to bear on the enemy who will have moved onto the ice just above your start point. Do so, avoiding return fire where you can and also making sure your units finish off the ice. Again this is key to winning the third Gold Skull. If any units are damaged, try to have them finish the turn on either the cleansing or monk shrines, as that will heal them.
Round 3
Choose another salamander monk, then continue as on the last turn – killing the enemies in the middle with the 2 salamanders and 2 archers. If anyone has got close and has life, use the cavalry and again remember to finish on one of the shrines (or rice field whilst active) in order to regain health. You’ll notice enemy skills will begin to pile up on the ice, which you’ll be grabbing later.
Round 4
Round 4 usually marks the first assault of the Oni, who will come from behind every 4 turns that follow. You should have an infantryman back who, with Akamoto will be able to kill the Oni. Then start to move Akamoto towards the rice fields. Oni don’t move far, so next time one appears you should be able to pick it off with ranged fire because the enemy numbers will be thinned.
Round 5 onwards
Just keep on drawing the enemy down and killing them – once the rice runs out you will find this quite easy and it is entirely possible to keep all of your troops alive by hanging back like we’ve suggested. The Oni will never pose a real threat to an archer/salamander/infantry combo as long as you get the first hit in and stay at range. At the same time, the enemy troops who come from further will spend more time on the ice – more often then not you’ll see at least 2-3 killed outright just because of the avalanche.
Obviously, you’ll also want to make sure your units don’t finish a single turn on the ice because that will lose you the Gold Skull for avoiding damage by the avalanche, which is quite easy to get really.
Gold Skull 1 – Beat level in 9 rounds or less
For this one, ignore the guide beyond round 2 and just go for it. The monk and cleansing shrines along the way will allow your troops to heal damage taken from the avalanche and you should still be able to take down the enemies earliest forces easily. The second outcrop of snow along from the monk shrine you’ll capture on turn 2 has an Oni cave and it is quite useful to have a cavalryman run round and then withdraw back again in order to activate the Oni, if you think that the enemy will be passing that spot on his next turn (remember he moves before the Oni.) If you can capture the second set of cleansing shrines by turn 5 then you are in with a chance.
Gold Skull 2 – Beat level without losing any units
This one is easy, just follow the guide and save each turn in case you make a mistake.
Gold Skull 3 – No allies damaged by the avalanche
Again, similar to not losing a unit the best tip here is just to save each turn. It’s sometimes possible to end up JUST on the ice and to be hit, which will cause frustration if you have a full game restart.
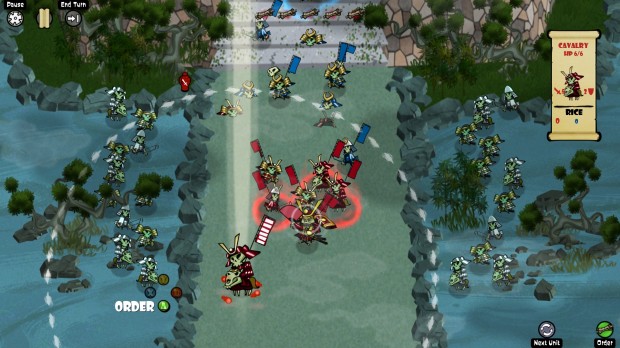
Region Five – Level 3 – Frozen Finale
This isn’t such a tough level, but it does require a bit of careful thought, planning and strategy. It can become a war of attrition (which is fairly easy) but there are other ways to do it. The strategy which we are going to describe here will pretty much ignore the whole left side of the battlefield. With regards to Yuki’s freeze ray, keep your eye on the way that the colour of the ground changes where her freeze spell hits – this is your cue to keep away!
Round 1
Send the top cavalryman up to the left to capture the distant rice field. Then send the other to the right to capture the furthest one. Send an archer behind him to capture the next paddy and then just use any units to capture the 2 fields right where you start.
Round 2
The enemy will send an archer to attack your topmost cavalryman, so withdraw him back to the start. Send the other cavalry (and the archer) to attack and kill the enemy archer just along, if at all possible. Follow up behind them with the other archer and infantry – you’ll be attacking the right flank and holding the area around where the recently deceased enemy archer starts.
Round 3-4
Chances are the enemy will now advance down the left to take your rice field plus the other one. It’s ok to send either the cavalryman or another unit out to impede their progress, but don’t worry too much about it. Instead, make sure you move to capture the summon and monk shrines, plus the two rice paddies up the path you’re already on. Then consolidate at the bridge.
Round 5-6
Akamoto will be coming under threat from what will almost certainly be a steady flow of enemy forces. The good thing is that because they are likely to come in 1’s and 2’s that you can awaken him and begin to kill them one by one. Be careful not to be overwhelmed and eat skulls, as this is a good chance to demon up on Akamoto. On the right hand side, decide if you want the Gold Skull for not being frozen or not (avoiding this is painfully slow.) If you aren’t bothered, summon archers and cavalry from the shrine. Only cavalry can realistically cross the bridge without being frozen and this crossing will be hard due to the enemy defenders, so hold your side, draw them out and use either archers or a salamander monk (if you chose one) to thin out the enemy numbers.
Again if you aren’t bothered about being frozen, it’s worth knowing that one unit (who is frozen) can shield others. This can be useful on the bridge if you don’t have (or can’t afford) any more cavalry and haven’t crossed yet.
Round 7-9
The enemy will be low or out of rice by now and the units will be thinning out. Akamoto can take on everything they are likely to send down the left, especially if you happen to have left even a single infantry unit with him. As you work your way through them, aim to position Akamoto at the bottom of the steps to where Yuki is, but stay out of the way of her freeze attack. Hopefully, you will be over the bridge now with a couple of demon units. Claim the shrines here and if you haven’t been hit by ice yet, go for a salamander and think about buying archers.
Round 10 onwards
Once you have gotten to this point, getting up the steps to Yuki is not easy. The game mentions making a spirit wall with her to absorb the freeze spell from other units, but that doesn’t seem to work. We think the game is referring to the fact that if you put another unit in the line of sight between Yuki and the original target, that unit will be frozen instead.
Killing Yuki without being frozen is extremely painful and requires getting as many demon cavalry as you can up onto her platform without being in line of sight. There are limited paths for doing so. If you have come along the right flank, then try positioning the cavalryman on the summon shrine. From here, in a single turn, he should be able to get up and behind the rocks to Yuki’s right. From the central bridge, same thing to the othe rocks. From the left bridge? It can’t be done. Now just dart out, hit her (for not much damage) and dart back again.
Another way to defeat Yuki which we’ve heard, but not confirmed, is to use crow monks to blow her off the ledge – with 3 demon monks using typhoon together in a single turn, this seems plausible but hasn’t been tested.
Once she is dead, use Akamoto to easily defeat the enemy general.
Gold Skull 1 – Defeated Yuki
Quite easy, but rather timeconsuming if you want to avoid being frozen – just check out the guide
Gold Skull 2 – Defeated enemy general with your general
This one is the easiest Gold Skull for this level and should be your go to approach anyway. After all this is the final battle with the hated traitor Kurokawa
Gold Skull 3 – No allies frozen by Yuki’s magic
Not at all easy this one. Follow the guide for some insight into how it can be done, but basically you will need to really take your time and work around the level very slowly and carefully. Pay attention to the change in colour on the snow where her attack arcs outwards and save each and every turn just in case something unexpected happens.
Region Five – Level 4 – End of the line
This is, as you will have guessed by now, the last campaign level in Skulls and is probably one of the most challenging in the game; mostly because it’s cheap. You’ll notice right away that all the enemy units are demons (this applies to all new units entering the battlefield too) – talk about a difficulty spike. In addition, the enemy general (and his royal guard) can freeze your units with a single hit, which is rather annoying.
Round 1
During these first few rounds, you’ll need to consolidate your position and take out the enemy archers and cavalry that are immediately threatening your starting position. To do this, on the first turn just use a couple of infantry to capture the cleansing shrines, then 2 archers to capture the rice. Have another unit eat a skull. The idea being that the infantry are the most atractive enemy target.
Round 2
The enemy may well actually just try to capture the monk shrines and rice fields. Consider yourself lucky if this happens, as you will be able to gang up a couple of archers and infantry onto one of the enemies haunting a monk shrine. Make sure you get the kill and use any more orders to eat skulls or attack a threatening foe who is not haunting (hence will not heal.)
Round 3
You should find yourself able to gang up on another enemy this turn, preferrably the first or second archer depending on what happened last time.
Round 4-6
By now, you should be more or less clear of the 4 enemies who started the round against you and a few other enemies will be coming through from either side, but not in a huge or threatening volume. Now pick a side to go up – the left is easier because you can knock enemies off the edge, but that won’t help you get the second Gold Skull, so the left might be better if you’re after that one. With the immediate threat reduced, you can take at least a bit of time to clear up some of the skulls and maybe get on towards a demon unit or two. Obviously you will also want to grab the monk shrines and any rice you can in the area – the cleansing shrines a bit further up are not a neccesity, but are helpful.
Round 7 onwards
As for the choice of which route to follow, you’ll also have noticed that the enemy is focussing on one side or another. If you have (or plan to) bring Akamoto into your forward group, then you should probably go the opposite route as you have nothing really to lose back at your starting position. If you have left Akamoto back, then you may wish to meet the enemy head on.
A combination of 2 archers (or 1 demon archer) and salamander monks is a really useful combination to have when facing any individual enemy unit, as you can usually take them out in one turn. If facing an archer, just start with the salamanders at the limit of their range and hope for 1-2 hits – the archer(s) will then finish the job. That’s the key really to breaking the enemy lines – make sure you focus in on one unit at a time and make the kill, then retreat to a spirit wall due to the ice, pools and cliffs around the level.
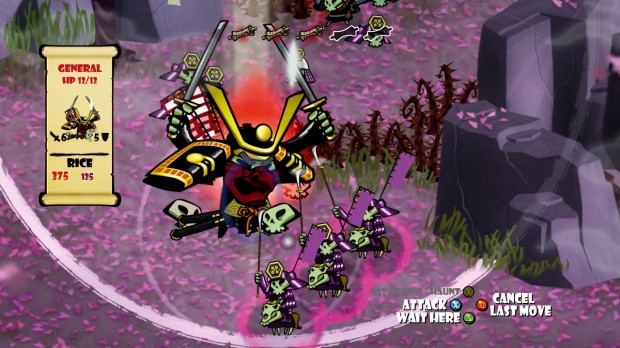
By around turn 18 at the latest, the enemy general will be sending his royal guard. You can tell these guys by the blue ring that floats around them. Kill them just like any other unit, but beware of melee combat unless you have no choice. You definitely don’t want to leave these guys alive in amongst your troops at the end of a turn.
When the Shogun himself joins the battle, he will be just like any other general except that he heals at the end of a turn, can’t be killed by any unit besides Akamoto and freezes your units when he attacks. Use other units to weaken him (in a single turn) until Akamoto can finish him. If he ends up heading out to meet your force before Akamoto is in the battle, just back off because fighting him will just leave to freezing and death for the units that you need to keep alive in order to weaken him.
Gold Skull 1 – Eat at least 20 skulls
You should have no problem achieving this one just trying to stay in the game. Aside from the skulls at the start, you’ll find that whichever side of the field you go down will soon become an absolute bloodbath (as much as can be achieved with skeletons anyway) so you should be able to grab loads. This Gold Skull goes hand in hand with the third.
Gold Skull 2 – Didn’t knockback a single enemy over ledges
This is a tough Gold Skull to get because human intelligence and good tactics dictates that you should knock enemies off the edge to address the advantage that the enemy has. It’s by no means impossible, but if you are adhering to our suggestion of taking out enemies 1 at a time using perhaps 3 orders/units per turn, then you will find you can be overwhelmed unless you do knock some enemies off the edge.
It’s a tough balance and it may be that a second playthrough, focussing on heading up the right with Akamoto for a quick kill on the Shogun is your best bet. That worked for us anyway.
Gold Skull 3 – Beat level with 1 of each kind of monk as a demon
This one is only tough if you go left, because by the time you reach the third monk shrine, the enemy will be growing thin. It’s always easy to hit the first two demon monks, but you must remember to select different kinds on the first 2 shrines. It’s easy to forget and just go for your favourite here if you are rushing!
And well done, you’ve completed 17-Bit’s fantastic Skulls of the Shogun. We hope you enjoyed our guide and found it useful and we’ll be seeing you on the battlefield via one of the many multiplayer modes soon!