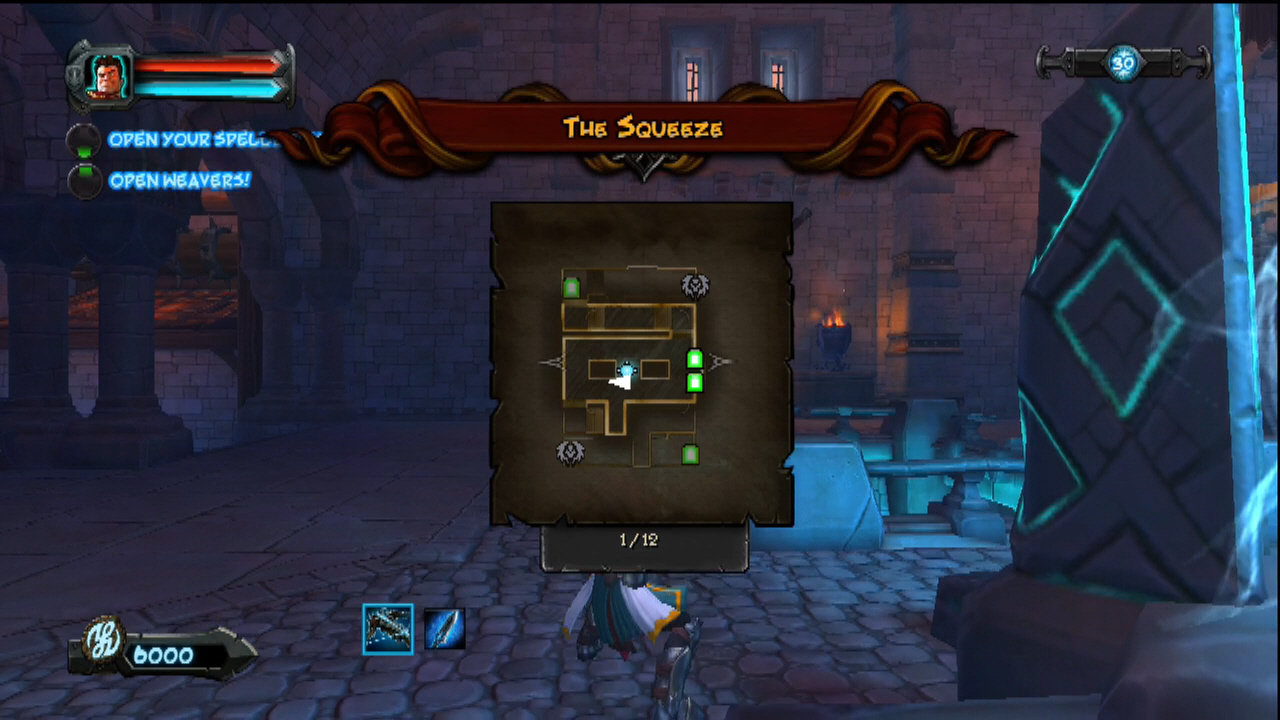
Orcs Must Die!: The Squeeze (Level 22)
New weapon
Grinder – Sucks enemies in and demolishes them as they run by, one of the few traps that does constant damage for the most part (rather than damage over time). However, it does jam, so be wary of that. This one’s great for mopping up kobolds.
Enemies
Orc Warriors
Crossbow Orcs
Kobold Runners
Hobgoblin Shaman
Hellbats
Fire Ogres
Armored Ogre
General survival skills
- Managing both sides evenly will be nearly impossible
- The bottom level is far easier to trap, so use blockades to make a maze that manages itself
- Bring the ice amulet to take out the flying wave or they’ll sneak into the rift
- Always freeze ogres to do additional headshot damage
- Use push traps in blockade mazes to force enemies to do that section over again
- Be wary of shield orcs as there are many
Five skull guide
The first time through this level will be an absolute nightmare. Without upgrades this level can easily be full of frustrations and difficulty. In that light, this one might take a couple tries. Every level can be thwarted, however, and this one is no difference, so let’s get down to it.
The bottom and the top lanes of this map are very different. For one, almost nothing that gets into the rift will come from the bottom if a proper floor and wall plan is setup down there. That means blockade maze early (about five rows will do it) filled with alternating brimstone and tar, the walls garnished with grinders. Here’s a trick to make this one a sure thing: at the end of each maze row, before turning down to the next row, put a pusher to send some enemies back to the top of the row. It’s a pretty brutal thing to do, but if setup early enough (do this as soon as possible) it’ll ensure only Ogres make it through the bottom (without their shaman buddies). And this isn’t the beginning of the game, ogres are cake by now (ice + headshots).
The tough part is top. Be confident enough to let the bottom run itself, and use paladins as insurance if not feeling comfortable. The top only has one bridge with space for two swinging maces, so use of that space will be necessary, but early game isn’t decided upon it. For this map, take either Knowledge or Elemental weaver because managing the greater onslaught at top will be far easier with extra speed and mana. Every time hellbats spawn, pop them with an ice blast immediately. By the second Go Break (before wave 7) have a small grinder setup (split by a blockade) to keep the kobolds from being an issue. As always, feel free to cover with paladins.
There’s a LOT of enemies, and the ogres from top will be a problem if they bowl over any guardians and they’re not too hurt by grinders, so they’ll have to be taken out with ice and headshots. One thing that helps with the massive amount of enemies however is combining ice and paladins, believe it or not. Freeze enemies as they surround the paladins to give the paladins a leg up, and buy time. Ultimately there’s not a lot to do beyond make frequent use of the teleporters, and don’t forget about the log traps either. Near the end they’ll be godsends if they managed to remain unused.
Waves
- (A – North) Orcs & Hellbats,
- (B – South) Orcs,
- (A&B) Kobold Runners, (A) Orcs & Shaman, (B) Shield orcsGo Break
- (A) Hellbats, Orcs
- (A) Hellbats x2 (B) Archers, Orcs
- (A) 1x Armored Ogre & Shaman, Orcs (B) Archers, Orcs, 1x Fire OgreGo Break
- (A&B) Kobold Runners, Orcs (A) Hellbats
- (A&B) Archers & Shaman
- (A&B) Shield Orcs x2 (A) Hellbats x2Go Break
- (A) Shield Orcs, Archers (B) 1x Fire Ogre, Kobold Runners
- (A) 2x Fire Ogre & Hellbats, Orcs (B) Orcs
- (A) Kobold Runners & Hellbats, Hellbats x2, Shield Orcs, 1x Fire Ogre, 1x Armored Ogre & Shaman (B) Orcs, 1x Fire Ogre, 1x Armored Ogre & Shaman


