
Magic 2014: XBLA Fans Campaign Guide
Magic 2014: Duels of the Planeswalkers was developed by Stainless Games and Wizards of the Coast and published by Microsoft Studios. It retails for 800 MSP and was released on June 26, 2013. XBLA Fans awarded Magic 2014 a coveted Buy It! award in our recent review.
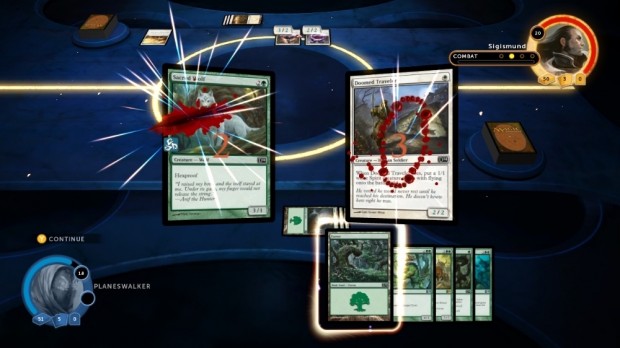
In this years edition of Magic: The Gathering – Duels of the Planeswalkers (known herein as Magic 2014) the campaign mode has been revamped to provide a story driven twist to accompany the usual spell slinging shenanigans. In this guide, we’ll be walking you through the campaign mode to ensure that you can assist Chandra in catching her man.
The campaign mode is divided up into Planes, which the player will visit in turn as he helps Chandra to search the multiverse. Each Plane consists of three encounters (against opponents with limited decks of cards) followed by a ‘boss’ battle of sorts against a named opponent, who will be using a complete deck which can be unlocked following their defeat.
Innistrad
Moorland Zombies
Unsurprisingly, the Moorland Zombies encounter is all about zombies. The encounter begins reasonably slowly (albeit with a tough 2/2 zombie that will drop in tapped on the first turn). The trick to beat the undead horde is with Chandra’s Firwave deck, which features sufficient flyers, high damage/low toughness creatures and burn to keep the zombies at bay. A lot of the zombie cards are buffed by the number of other zombies in play – so don’t sit back, attack often, trade away cards if need be and use your direct damage spells to hurt the enemy and his cards.
Skirsdag Cultists
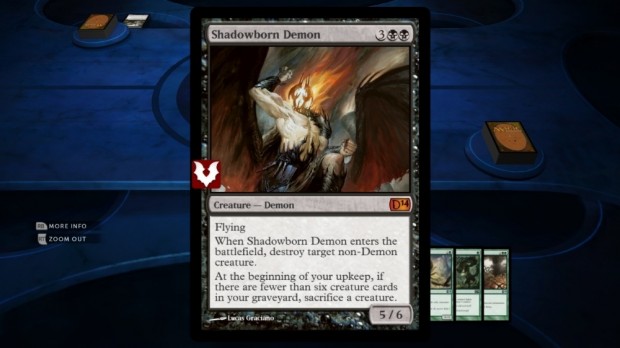
This encounter is quite different to the last one, but must be defeated in a similar way. In this encounter, the enemy will repeatedly drop one or two cards called Shadowborn Apostle. Once six come out, they will be sacrificed and replaced with a demon card called Shadowborn Demon. The best (and most sensible) way to defeat this deck is to prevent the demon from appearing, because once it does, it’s trouble! Use burn spells like Shock to kill the little guys and keep swinging whenever you can – a creature trade in this encounter is ALWAYS better for you!
Angry Mob
A quick note for glory hunters – if you lose this encounter you will gain an achievement! For the rest of us however (or when you’re ready to win) you’ll need to pay close attention to this encounter, which works similarily to Moorland Zombies. This encounter works by throwing lots of small creatures at you, some of which will grow (Unruly Mob) whilst at the same time, using the enchantment Vigilante Justice to maximise the effect that each creature entering play has upon you. If you happen to have been duelling Planeswalkers as well as tackling the campaign, then Garruk’s deck is good here because the creatures are so huge that they can roll over the mob. If however you are sticking with Chandra’s deck, save your burn cards for key enemies like Unruly Mob or Thraben Doomsayer, then try not to worry too much about the weenies.
Avacyn’s Glory
In this encounter, you will actually face off against a complete deck with random elements, so predicting what will happen is more difficult. Essentially though, the deck features many identical cards to the previous Angry Mob encounter and works by using the synergies between human and angel cards. Early on, you will more than likely face a lot of Doomed Traveler, Eldar Cathar and Selfless Cathar and then cards which benefit from their deaths such as Uruly Mob, or any other human really. The deck also has features Path to Exile and Oblivion Ring, which will take care of your big threats. The best bet here is use a deck which places little value on any one or two cards (such as Chandra’s Firewave deck). With such a deck in play, you can throw your creatures into attack or defence as needed, burn the big threats and forget about the creatures which get exiled – usually because you can still recall the occasional one from your graveyard or whatever.
Zendikar
The Teeth of Akoum
This encounter is based around the Kor, a race known for their love of weird and wonderful contraptions. The first card you’ll see is the common Kitesail Apprentice, which will be closely followed by Adventuring Gear and probably, a Kor Duellist by turn four. Most decks can work here, as the encounter relies heavily on a small number of cards which are buffed by equipment. Chandra’s deck is perfect, because every time the enemy equips and looks likely to swing for damage, you can burn the creature away and keep having the opponent waste mana. By using this method, you won’t run into too much trouble.
Rival Expedition
Rival Expedition is an encounter which is built around tough creature cards like Jorada Bard and Hada Freeblade – leave the latter card on the field for too long and you may find yourself looking at a 4/5 creature in no time at all. Like Unruly Mob and Champion of the Parish before, destroy the Freeblade with burn early on before it grows and you won’t go too far wrong. Again Chandra’s deck works well, but so does Garruk’s and the Avacyn’s Glory deck that you unlocked when completing the previous plane.
Survive The Roil
This encounter is all about direct damage and burn spells like Earthquake and Roiling Terrain, although it is on the whole vulnerable to fast speed decks with lots of creatures – in particular those with haste. Chandra or Jace’s deck are good options, because both have a number of flyers to spare and in Chandra’s case, there are a few haste cards in there too.
Chant of the Mul Daya
In this encounter, you will face Girundar the Shaman. His deck is extremely slow, but is based around a small number of cards which provide near certain win conditions, should they hit the board. During the early stages of the game he will look to chump block with cards like Farhaven Elf (its usefulness being that it brings a land card with it) whilst also increasing his life total with Grazing Gladeheart, which provides two life each time a new land comes into play. It’s a tough deck and you will need to maximise every card. Chandra’s deck is useful because of the high damage of her low cost creatures, whilst Jace’s is not bad either, because cards like Unsummon, Cancel and if the worst comes to the worst , Claustrophobia will help to handle the big boys. Be careful with this tactic though, because unsummoning a Pelakka Wurm will mean that Girudar gains 7 life not once, but twice!
Shandalar
Jailbreak
In Jailbreak, you’ll face mostly annoying enchantments that prevent your creatures from attacking or blocking. That, and you only have nine turns in which to win! The best strategy is to go with a deck full of small, evasive creatures which hit the board more or less every turn – Firewave, Mnd Maze or Avacyn’s Glory are therefore quite good options. In your opening hand, you will want to see at least two 2-3 mana creatures, enough land to support them and ideally some removal. Every time you throw a creature out, the AI may move the Prison Term enchantment onto it (or another) of your creatures, so don’t base your strategy around any one dude. Also remember to check the Gargoyle who starts out on your side out, because he can lose defender and gain flying for 3 mana, once that enchantment moves on! If an enemy creature comes in – use your removal, or if you get the bad guy down to a couple of health, don’t be afraid to deal direct damage.
Weather the Storm
This encounter does what it says on the tin! You’ll face very few (if any) creature cards, but lots of annoying early enchantments and spells like Aether Storm, Time Ebb and Stabbing Pain. This is another encounter which calls for a lot of fast creatures to hit the deck as quickly as possible, but favours the Mind Maze deck least, because of the fact that most illusion creatures will be destroyed by becoming the target of a spell. If you have a creature card to play, always take the four damage to sacrifice Aether Storm and get it out there – after the first few turns, this encounter has relatively limited means of removing creatures in play and even less ways of blocking them. Building up a decent offensive base is therefore the only way you can win.
Eloren Bramble
This certainly not the toughest encounter, but it uses a couple of different mechanics (all of which are based around landfall) to keep things interesting. First up, you’ll see Vinelasher Kudzu and Lashing Creeper, which gain +1 tokens or get vigilance respectively each time a land enters the battlefield. This means you’ll have to deal with Kudzu sooner or later, so early removal can be useful. Later on, you’ll see some Sporemound cards, which produce saproling tokens when a land enters – nothing too much to worry about. A solid creature deck will have no trouble here, neither will most others to be honest.
Sliver Hive
Well, if you defeat this encounter then you will unlock the deck that so many people have been looking forward to! Slivers are a race of creatures which share a hive mind and are therefore able to influence each other with bonuses like haste, first or double strike, trample and attack of defensive bonuses. A lot of slivers on the battlefield will only end in disaster, so the first tactic is to keep their numbers down. Even a 1/1 for one mana which gives first strike to all other slivers can become a big pain when a 5/5 lands in a few more turns. The sliver deck has a balanced green/red/white mana base, so targeting or restricting land is a good tactic here, as is bouncing creatures back to the hand. If you use a deck like Avacyn’s Glory, trade your creatures (especially tokens or when Unruly Mob is out) away often and try to avoid letting the AI have the run of its mana by using Path to Exile too much. Firewave or Mind Maze both work well here, as does Avacyn’s Glory, but neither of the core green decks is as useful due to speed.
Alara
Rumble in the Jungle
This encounter is all about small green creatures – mainly saprolings – which are generated largely by the death of another creature. In fact, the largest creature the enemy is likely to throw at you will be the Sprouting Thrinax, which is a 3/3 that produces three saprolings when defeated. It is a dissapointingly easy encounter which any deck can defeat if even the least impressive board presence can be established. Try using your recently acquired Sliver Hive to unlock a new card with relative ease.
Goblins in the Pass
As you would expect, you’ll face a goblin horde in this encounter, although thankfully the AI does not have access to the nastiest goblin cards. Expect to see Goblin Mountaineer (has mountainwalk) and Dragon Fodder (creates two goblin tokens) early on, then later a Goblin Chieftain will come out to buff his team before the process repeats again. Almost any deck you have access to will be able to outgun these guys, especially if you can save a removal spell for the first chieftain to come out.
Survive the Volcano
This is a tougher encounter which features an offensive line of red creatures which are mostly fairly tough and powerful. A good deck to take is Mind Maze, because the enemy will play a number of Lava Hounds, which is a powerful 4/4 with haste for only four mana, but the payoff is that it causes the caster four damage. In a nutshell, if you can unsummon it repeatedly, it will do damage for you. In addition to the 4/4 and 5/4 creatures which will hit the board by around turns four and five, you’ll need to contend with quite a few direct damage and burn spells when either attacking or blocking. Big removal spells (four damage or exile etc) is a big winner here, so you can use any of the red or blue core decks really. Sliver Hive also has a chance here, as it has decent removal and such good card synergy that by turn four, you may also have some creatures dealing packing good stats.
Enter the Dracomancer
This dragon/wurm/devour themed deck has a lot of big creatures and a lot of ways to make them bigger, although as it is fairly evenly spread across green and red (with a splash of black) then you might also be able to hope for some mana screw. Things will probably start off slowly, with Dragon Fodder or Tukatongue Thallid hitting the board as cheap blockers and devour options for later. Trading away your own cards for these guys is probably a bad idea, but if you can swing against them with reasonable safety, then you should probably know that the AI will probably want to keep them in the game rather than use them as chumps. If the AI survives to have five or six mana, you can expect to start seeing big 5/5 creatures come in, and if devour is possible, they will grow to 7/7 and bigger sometimes. The ultimate goal of this deck is really to play the Hellkite Overlord at four/black/red/red/green – which is not an easy task. Don’t neccessarily hold back your Path to Exile or Counter for just such an occasion, because some of the other big cards can be just as nasty. The good thing is that there can only be so many, right? Chant of the Mul Daya works against this deck as it has a similar pace, whilst Mind Maze is also an option. Firewave and Avaycn’s Glory don’t have the late game pace to match this deck, so if you don’t get an early win then you are likely to lose later on.

Ravnica
Gruul Raiding Party
This is another tough encounter, in fact one of the toughest! The encounter begins with a Goblin Fireslinger which will harm you every turn using its ability, then the AI will follow up with a creature with bloodthirst – which will result in one or more +1 tokens and possibly an ability being added to the creature. In a nutshell, this results in very big creatures, very early in the game! The tactic to use against this is easy to imagine, but often hard to implement – kill the fireslnger, for starters. To achieve this, you’ll need to play a deck with cheap removal – preferrably a turn one Path to Exile. If you fail to do this, the first creature to land with bloodthirst will be Scab-Clan Mauler – a 3/3 with trample which will be very hard to stop from hitting during the first three or four turns, resulting in yet more bloodthirst cards. Mind Maze is a good deck because of the cheap removal and counter spells, assisted by a good number of low cost flyers. No matter what deck you use, it won’t be an easy one!
Simic Clones
In this encounter, you’ll face up against a Simic deck strategy which has a very tough win condition – if the AI controls four cards named Biovisionary then he wins the game. What makes the encounter interesting is that the AI pattern is very agressive – not only playing Biovisionary cards, but also cloning them and using an enchantment which clones whatever creature it is attached to at the start of each turn. Another painful irritation is that Biovisionary is a 2/3, so it is slightly more resistant to the usual removal than most creatures. The only sure fire way to win this encounter is with decent removal or combat tricks which involve drawing the Biovisionary’s (which will attack) onto a weaker blocker, then using an instant to buff your creature for the kill. Either the Mnd Maze or Firewave decks spring to mind, although Hunter’s Strength can also do a job here due to combat tricks (it is just a bit slow.)
Sewers
By the end of this encounter, you’ll hate rats just as much as Indiana Jones! It begins slowly, with a Muck Rats and a Ravenous Rats arriving on turns one and two. After that, all bets are off and you will start to see a card called Relentless Rats every single turn. Despite being so predictable that you could set your watch by it, this encounter is tough because Relentless Rats gains +1/+1 for each other creature with the same name – and there can be any number of them in a deck. What this boils down to is that you need a deck which can ramp up to speed within about three to four turns, hitting the board consistently on each turn. You will need removal and because the first Relentless Rats begins as a 2/2, any deck will do – again the best bet really falls to Firewave or Mind Maze. Sliver Hive has an outside chance as it has some removal, as does Enter the Dracomancer, although it will usually work out being too slow.
Masks of the Dimir
This boss encounter is a tough one because Masks of the Dimir is a decent and versatile deck which can cope with most strategies, whilst also implementing its own. You’ll need to expect for your creatures to be bounced back to your hand often and for a lot of your cards to be milled (when the enemy causes you to discard them from your hand or library) so the best strategy is to avoid reliance on a single big card. Avacyn’s Glory, Firewave, Mind Maze and Sliver Hive are all good decks to use here, whilst Chant of the Mul Daya is probably the worst.
Kaldheim
Prophetic Ravings
Acting as the final boss for the campaign mode, you will face Ramaz in a kind of archenemy style game in which Chandra will assist you. Ramaz will begin the fight using whatever cards he can to generate and play more land – including drawing cards, enchantments which allow a second land to be played and so on. As soon as he can, he will then begin to play some of the biggest, nastiest spells you can imagine; including Dragonlair Spider, Blatant Thievery, Crush of Wurms, Master of the Wild Hunt, Earthquake, Prophetic Bolt and so on. To win this encounter, you need ways to deal with the big hitters when they land, but for the most part you will be able to chump block them whilst dealing consistent damage yourself, due to the speed of Ramaz’s deck. Yes, sadly Ramaz is not the ultra-tough Draco-genius that we saw in Magic 2013, and you should be able to beat him fairly easily with Chandra beside you. An ideal deck to use here is the Masks of the Dimir deck that you just unlocked, which has a decent mix of creatures, damage, removal and combat tricks. If you want to have some fun whilst Chandra soaks up early pressure, use Chant of the Mul Daya!
Quick Links:
XBLA Fans – Guide Hub
XBLA Fans – Challenges Guide
XBLA Fans – Sealed Play Guide