Fez Cube Guide – Observatory Area
Ahh, space. It’s a wonderous thing, isn’t it? Yes. It is. Let’s get to work.
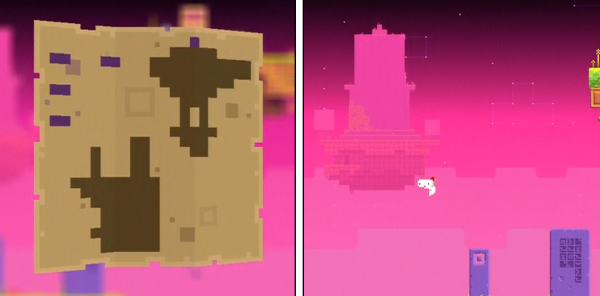
The very first bit of the Observatory is connecting straight up from the Main Hub. Here there’s a chest which is begging to be opened along with a door just below it. But soft! We must have a certain treasure map to acquire this chest! If you have the map that looks like this place, we’ll help you solve it in the SPOILER ZONE, if not, keep it moving.
Head through the door and proceed onward.
This door leads us to the Observatory! Or, at least to the hub, which is not technically the Observatory, but for simplicity’s sake we shall refer to it as such. However, at the moment we’re at the Space Throne, as we like to call it. This place is actually a giant throne with a stone dude sitting in it, cool huh? He looks bored. Anyways, let’s open some doors and grab some bits. The bit is at the top, the doors are all over the place.
There’s a door at the top left (facing the front of the throne) which you should definitely investigate. It’s been a while since we’ve had one of our very favorite riddles, the giant slab with cryptic symbols on it! This time, we won’t need a cipher though, just our brains, which we brought for you if you’ve lost yours somewhere.
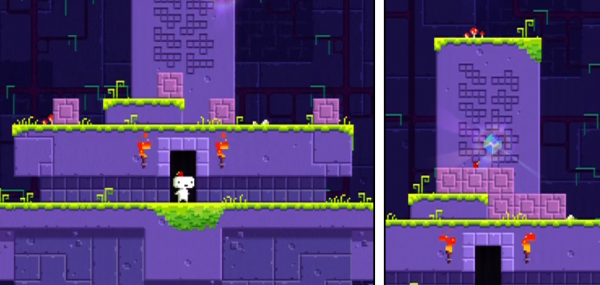
Puzzle Anti-Cube – Here we have ten different shapes on a big slab and six small blocks. They’re all different, there’s not a single overlap, but there’s no indicator as to what you actually have to do here. Do you make those shapes? Can you make those shapes? Is there only one that’s possible?
By process of elimination we learn that many of those shapes are indeed possible without any sort of strange dimensional manipulation. In fact, the goal here is what’s not on the slab.
Each of these ten shapes is a way in which a box can be constructed. As such, there’s a couple answers to this one, but we’ve picked one that’s super easy. Simply grab three blocks and, while facing the slab markings, place them on just to the right of the elevated area. Then, starting with the block exactly adjacent to the elevated area, place a block on top, then two more to the left. This is a block-forming shape that’s not on the board and nets us another anti-cube!
Now back to the Space Throne.
Through the door at the center of the throne we shall first travel because that takes us to the actual Observatory Hub. Cool right? Not yet.
First up, we’ve got some jumping and bit catching to do. This place has a secret, so let’s keep it marked in our brains for when it comes time for the SPOILER ZONE. Make your way to the other side of the spires to find a door, which you should go through.
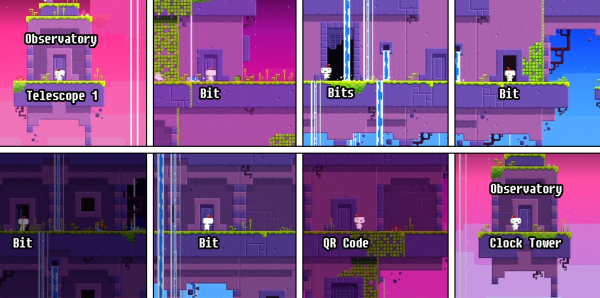
Okay, NOW we’re in the Observatory Hub. This place is pretty huh? Also… familiar? Nah, couldn’t be! Let’s move on, shall we? Let’s get a door map going.
As with every hub, there’s lots to do here with all the regular doors. Most of the doors are bits but you’ll notice that one of them has a QR Code puzzle in it. If you can’t download QR codes or don’t want to, here’s the code:
RT, RT, LT, RT, LT, LT, LT, RT
Our first actual door will take us to Telescope 1, where we’ll have our first encounter with the Time Switches. These, when wound up, change aspects of the level until the large red and white bar recedes into the switch. Here’s how you solve the first one.
Time Switch – Start off by rotating the switch four times to get maximum time. Then, while facing the massive spire while it has all its ivy facing you, jump onto the rock. Then, rotate left and begin climbing vertically. Once at the top of the vine, rotate left again and jump off onto the platform with another time switch on it.
Then, repeat the process here, and every other time you see one of these! They’re all pretty fun.
Cube – At the top of this place is a cube and a warp gate. Go ahead and time switch your way to the top then grab that shiny cube. It’s a bit early for that warp gate, but it’s up to you what you’d like to do.
Off to the side of the Telescope is a door, go ahead and enter it.
Logically speaking, inside the building is the actual telescope itself, complete with the ability to look through it! There are two secrets here, one of which belongs in the SPOILER ZONE and one of which you can actually find out on your own. However, instead of putting it here, we’ll save it for the end. There’s a reason for that. There will come a time when you can do both these secrets (and indeed you can do one of them already, if you catch it), but for now let’s return to Telescope 1.
There’s a door midway through climbing the giant rock at Telescope 1, which you’re welcome to enter. If you do so, here’s what you’ll find.
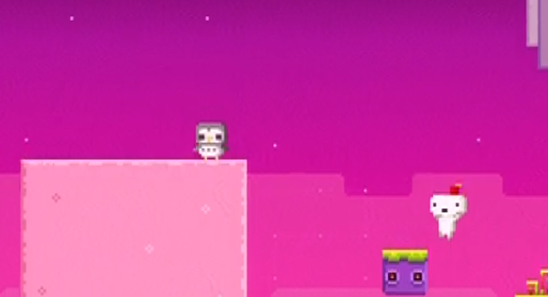
This place is pretty awesome, if only because of the huge statue int he center. There’s a cube and an owl here, so let’s get them both!
Owl – The owl shows up on the bottom-most pink tree next to the time switch, just wait for night for it to come out.
Cube – To get to the top of the time switch puzzle will require a bit more cunning than in previous puzzles. This time, we’ll have to rotate up, then jump onto the vines of the big block. Climb and rotate yourself such that you are directly next to the smaller block, then jump on to the exposed vines there. Rotate again such that you are facing the vines and climb down to the lower half of them. From there, rotate one last time to expose the final leg of the climb. Make your way up it to reveal the rest of the map for your exploring pleasure.
But wait, there’s more! There are some new blocks here. These blocks are always looking at you. If two blocks’ eyes meet, however, they’ll come together presumably for a loving hug. Unfortunately, their hugs are so powerful you get squished, which is no fun for you. As such, we’ll puzzle-con our way into getting that cube!
When you jump onto the bottom block, the two will start to fly at each other. Just as they do, rotate right and you’ll continue to soar straight up. From there, you can easily jump to the safety of the cube.
Now, at the foot of the Ancient is a door, and there’s a door in the tree just off to the side. We’re going to go through the door in the statue first.
This takes us to the Counting Cube. Yay Counting Cube! Simply shift around, go through the other door, then shift around some more in the new area and pick up the cube from the chest, then you’re done here. If you haven’t already, this will help you decipher the Number System, the solution and hints for which are back in Zu.
You’ll note the counting cube matches one of the walls back in that school room.
Continuing on, return to Ancient 1 and go through the other door. This door, much like the one you just came from, also houses something immensely important.
In this room is a stone slab with another squiggle on it (visit Zunu to learn more about that) and a strange stone with lights on it. When you do anything in front of this stone, it lights up in specific Tetris shapes. Each action has a corresponding shape, all of which match up neatly with the instructions found in Zunu. If you haven’t been there, go there, because this room is the key to the Shfit Cipher.
Because you may not have been there yet, the full connection between these two things will be posted at the very top of the SPOILER ZONE here in this guide page.
Back at the Observatory Hub, there are more places to go to! Let’s go to Clock Tower now.
Here we have some more hugging block and time shift puzzles, but we’re sure you can solve those by now. The shifting block at the top might seem insane at first, but it’s not, just have patience. What’s more insane is this gigantic clock with… four hands?
Cube – Before dealing with all that, let’s grab this cube. Wind up the time shift puzzle to raise the pillar-platforms then climb to the top for a cube. After that, get ready to have to do some tinkering.
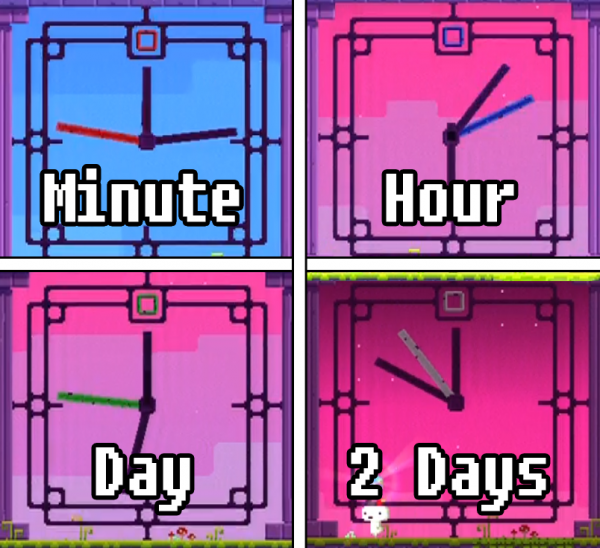
Anti-Cube x4 – This clock has four hands. Each hand gives an Anti-Cube for accomplishing a different thing. The red hand spawns a cube every minute, the blue is every hour, the green is every day and the white is every two days. Unfortunately, every one’s clock is different, the goal is for the hand in question to be at the 12 o’clock position, pointing straight up. Now, you’re welcome to mark the time down and wait, but you can also turn you Xbox offline and manually change the time and date, we won’t tell anyone.
Near the mid-way of the Clock Tower is a door we bypassed in our fervor to see what time it is. Let’s return to that and go through it.
Here we have a big museum looking-like building and some messily strewn about platforms. Hop around and collect the bit here, then head into the Museum.
Once inside, look around! It’s tempting to try and go through the fireplace, but this time it’s a no-go. However, there is still a secret to be found! Go up to the bookshelf and hold X to grab onto it, then open it up. Presto! Secrets abound.
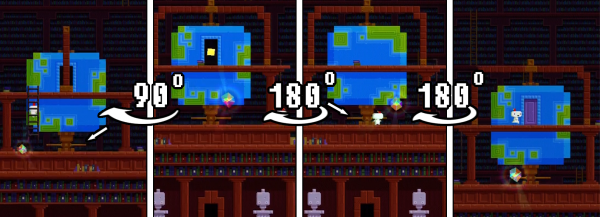
Stepping in even deeper you’ll see a room with a massive globe in it. This place is a bit puzzling, as there’s a bit, clearly, but where is it?
Bit – Hop down to the floor and grab onto the left side of the globe (assuming you’re facing the ladder). Push it once to rotate it, then rotate left to see the bit exposed and grab-able! So grab it.
Tome Artifact – Once you’ve picked up the bit from rotating the globe, simply drop down and rotate it twice more. This puts the opening on the opposite site. Check that side to find that there’s now a door there! Head through the door and snag the chest to find the Tome Artifact.
Here are some links to other areas you can explore:
– To Sewers
– To Industrial Zone
– To Mausoleum
– To Main Hub
!! – SPOILER ZONE – !!
Let’s solve this treasure map, shall we? We’re looking for the one that matches the Observatory – From Main area. If you don’t have it, come back later. Chances are if you’re down here for a treasure map it’s because you found it.
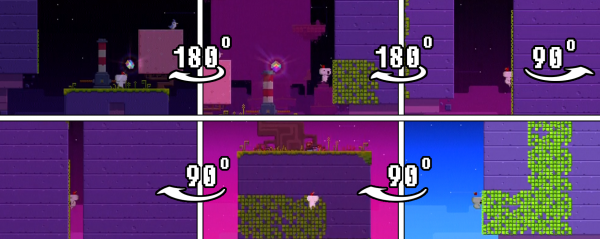
QR Anti-Cube – Simply set the area to match the treasure map, with the pillar and the slab with words on it facing to the left. Then, jump from the pillar to the left, then following the pattern described on the map. So. Up.
After that, you get another QR code! Again, to save you some time, here’s the code:
RT, RT, RT, LT, RT, RT, RT, LT
Alright, now that you’ve been to Zunu (or you should have by now) we’ll explain how the Shift Cipher works.
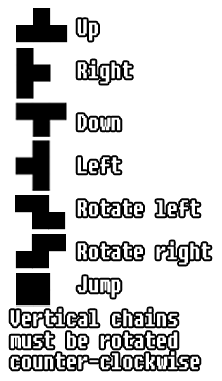
Shift Cipher – Some people call this the Tetris Code, and that’s entirely accurate, so you’re welcome to call it that as well. However, that’s not what we call it. Anyways, as per what we found in Zunu, each of these squiggles on the slabs can be broken up into Tetris pieces. Each piece, as we now find out, corresponds to a particular movement or action including moving in any direction, jumping, and shifting left or right.
Recapping, each squiggle is a series of Tetris pieces but, if found on a stone and written vertically, must be rotated 90* counter clockwise before deciphering. Each movement and action has a matching Tetris piece, and must be input in the order from left to right after properly rotating the code.
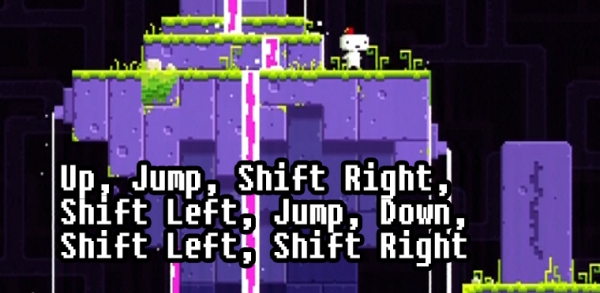
For starters, here’s the code for this very room:
Up, Jump, Shift Right, Shift Left, Jump, Down, Shift Left, Shift Right
As with every other code you may or may not have solved by now, here’s a cheat sheet for you.
Following the discovery of the Shift Cipher we’ve got a puzzle to solve. You likely figured out that the telescope can move and that at night you can see things (when else is a telescope useful?) but you might not have known what those things were. Well, there are two things this telescope is good for. We’ll tell you both, but first things first!
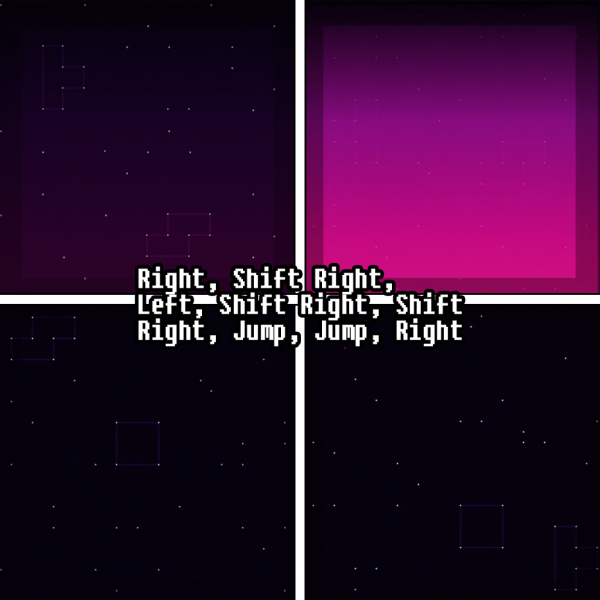
Shift Cipher – Jump onto the telescope and search the heavens (at night). You’ll notice as you rotate that each area has two constellations that look like Tetris pieces. Well they are, and they’re part of a code.
Pick a spot, then rotate right to get the code bit by bit. You can just start from wherever then enter it all on a loop until it triggers. Or, you could just check our code:
Right, Shift Right, Left, Shift Right, Shift Right, Jump, Jump, Right
Next up is the Red Cube. You may not know what these are yet and you shouldn’t, but you won’t know until you collect them, so do so.
Telescope Red Cube – Take another look into the telescope while it’s aimed at which ever quadrant has “Jump, Right” in the bottom right corner. On that same screen a sequence of flashing red lights will alternate left and right in the upper left hand corner of the screen (at night of course).
These lights are an indicator for more code inputs, much like the QR codes or rumble codes. Again, we’re not quite sure where this starts, but the sequence goes like this:
LT, RT, LT, RT, LT, RT – and then – LT, LT, LT, RT, LT, LT, RT, RT, LT, LT
Moving along, the Observatory has a bunch of end-game content. That means you’re going to need to be on New Game + to access this stuff. If you haven’t embarked on that already, back on up.
However, if you have, it’s time for another super obvious puzzle!
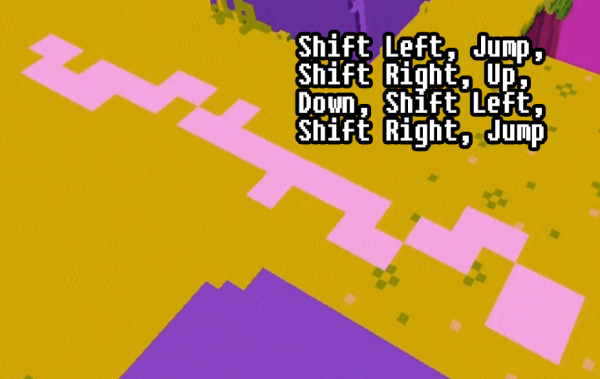
3D Anti-Cube – Jump on top of the purple pillar here and go into first-person. Look straight down at your feet and there you have it, a code for you. Here it is:
Shift Left, Jump, Shift Right, Up, Down, Shift Left, Shift Right, Jump
There’s actually two of these, so let’s keep it moving on to the next place.
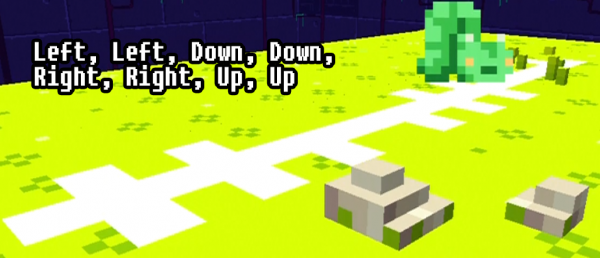
And here’s the other one! Again, just jump on the stone and look around.
3D Anti-Cube – Here you go:
Left, Left, Down, Down, Right, Right, Up, Up

