
Awesomenauts Guide – Map Strategies
So far there are three maps in Awesomenauts but there may be more. We will add to this guide as they are added to the game.
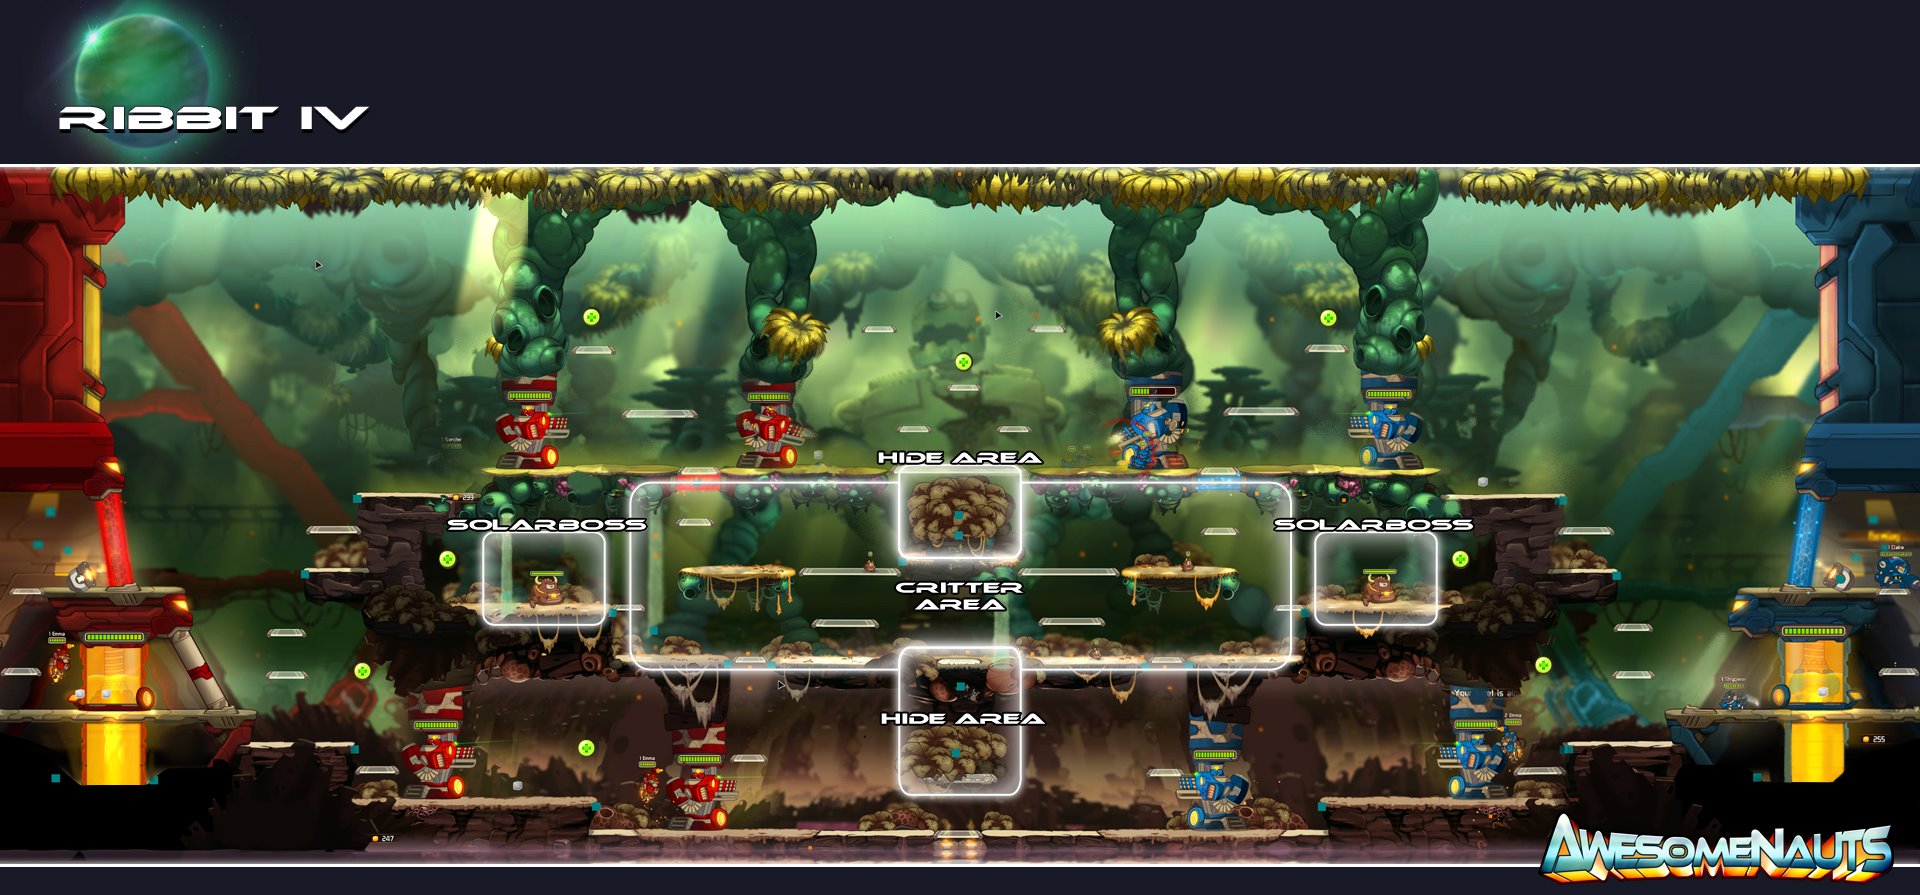
Ribbit IV

Ribbit IV is the smallest map and the only one with two towers in both lanes. The jungle here is plentiful and has two Solar Bosses, making this the easiest map to level one. Close quarters throughout the game mean you’ll want to take advantage of crowd control or “CC” abilities. This includes slows, snares, stuns and pulls/knockback. Anything that stops people from getting away is useful to prevent death or secure a kill. Along with that, the jungle is copious go there often. Any neutral monsters you leave alive can be taken by the enemy and that’s just more health for you to grind through, you’re better off grabbing it yourself. Lastly, the Solar Boss is 30 Solar for your whole team if you can kill it, but if you die to it it’s as if an enemy turret killed you, so be careful; there’s nothing wrong with triple-teaming the Solar Boss, especially when the enemy team is all dead.
————————————————————————————————————-
Support XBLA Fans by checking out the full Awesomenauts guide on Android and iOS ( Apple ).
![]()
![]()
————————————————————————————————————-
Sorona

Sorona’s early game is the longest of the three maps due to the massive distance between the opposing teams. Sustain (health), regeneration, range and speed are all priorities. Being able to chase or escape is crucial, and dealing massive damage to turrets for as long as possible can make or break the early moments of the game. Since pushing is a longer process here, healing the droids will be of definite help. On top of that, to facilitate their passage or to halt that of your opponents’, controlling the middle bush creates an extended zone of influence that helps mitigate the enemy team’s ability to escape. This is largely due to the placement of the jump boosts which can result in premature escape from even a well-organized gank. Since the jungle is so small (there are only four neutral creep on the whole map and they’re very much in protected territory) it’s important to get health or regeneration early. Last but not least, the worm is an instant kill, so devising strategies to get easy kills by combining knockback and stealth is a great way to setup long pushes.
AI Station 404

AI Station 404 has only one front-most turret, creating easily the most intense early game combat situations in the whole game. Range on AI Station 404 is the most important thing of all time, as winning the first tower war can result in quite a level imbalance by mid-game. Beyond that, defensive or pushing capability is tremendous, so AoE damage is second on the list; combining the two into fighting power is how you win on this stage, the strange path droids take means relying on them makes for a long game. Never let the flying bots sit in their cage, always release them, especially when you’re winning a push. On top of that once the first turret goes down fight hard for the super droid. Either keep it alive or kill it depending on which side of the push you’re on because free damage against your turret is way too painful on this level.