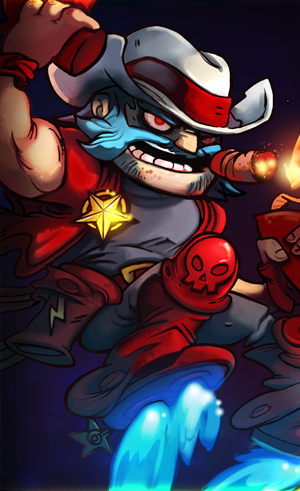
Awesomenauts Guide – Sheriff Lonestar
 Abilities Breakdown
[springboard type=”youtube” id=”um-ZhlEHa80″ player=”xbla001″ width=”480″ height=”400″ ]
Special 1: Holo-bull – Lonestar’s holo-bull runs in a straight line (even if used in the air) and knocks back enemies. While its primary function is to knock people away from Lonestar, the holo-bull has many applications. When ambushing enemies as they advance towards your tower, use the bull to knock them into the towers. If you’re safely behind your towers, use the bull to take out incoming waves of droids. When using the bull to defend your towers, build damage or the wave will just come back larger and larger. Lastly, one of the most difficult yet useful applications of the bull is pinning targets like Yuri, Voltar and Clunk (they can float) to the map to thwart escape plans.
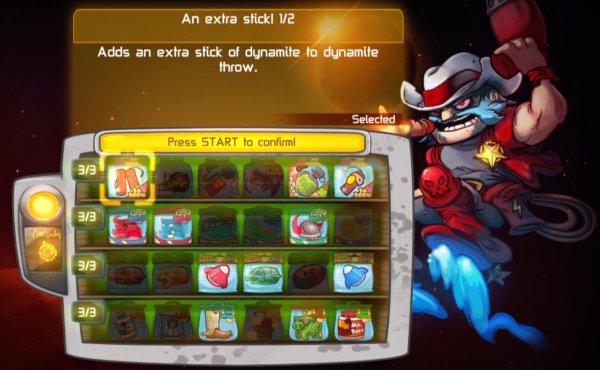
Special 2: Dynamite – Lonestar’s dynamite are a very unique ability. Well… most of them are. But the dynamite are one of the only abilities that don’t have a damage upgrade. However, you can add two more, so you’ll always take that. There’s no reason not to. The key to dynamite success is the aim- you can’t just throw them! Until they’ve got explode on contact (bounce/proximity) it’s important to aim for ground-based targets. Use dynamite to farm droids or harass turrets. From there, once you’ve got some upgrades you can use dynamite to hit moving or airborne targets because they’ll trigger on contact. Lonestar doesn’t always need his dynamite, but ultimately until you’ve got the two dynamite upgrades (so you’re throwing three) they won’t be useful enough.
————————————————————————————————————-
Support XBLA Fans by checking out the full Awesomenauts guide on Android and iOS ( Apple ).

————————————————————————————————————-
Builds
Level 2 Build
Lonestar is fairly straightforward to build when you haven’t unlocked anything yet. The different builds center around two decisions: either you’re going to chase people down with your gun (go boots, all three bullet upgrades and blind on the dynamite) or you’re going to do just about anything else you want (bring the greater explosion size instead of the blind on the dynamite). Either way, you don’t need the speed on the bull (ever) so bring everything else. Lonestar is great at farming no matter what you build, so if you plan to farm ditch the solar tree. However, if it’s going to be an issue, bring boots if you want to focus on offense and aggression, or regeneration if you want to play it steady and push to victory.
Early game Lonestar is where the magic happens, either go for dynamite, bull or gun- not all three. In fact, if you don’t level his attack in the beginning, there isn’t much reason to do it ever, just focus on his abilities. If you’re facing a heavy push team, it’s a good idea to take the bull and max his pushing ability. Instead of pushing enemies away from the tower (since you don’t have damage yet), slam your enemies into the tower so you and your team mates can lay on the pain. If you’re getting at least some degree of peace or want to play aggressively, go dynamites first. It’s important to focus on getting the extra dynamites, then the bounce. Build health so you can stay in fights longer, same with your regeneration. Taking your basic attack upgrades works with this build if you’re chasing people a lot.
When you’re losing…
If you’re losing, no matter why, you don’t need your basic attack. If you’re getting assassinated a lot, focus on playing defensive; take the cooldown reduction on your bull if you haven’t. The bull is Lonestar’s saving grace, the more you lose, the more you should upgrade it. Just because Lonestar is ranged doesn’t mean he doesn’t get hurt, so tank up if you need to! Which you do, especially if you’re defending your towers.
Our Build
Lonestar is a man of focus, as such you play him one way, another way, or the other way and that’s about it. We speak of course of picking a row and maxing it first with complete ignorance of the other ones (except the general one of course). Each row helps Lonestar do a different thing, complete a different goal and counter different strategies (or create his own). Let’s break it down.
Aggressive Hombre
When focusing on the dynamite your goal is to stay out of trouble while raining it down on your enemies. Constant harass damage is the key here, you won’t pick up any runners early on but they’ll lose just about every fight while you live to tell the tale and farm droids. The key is to start off with double dynamite so you have a better chance of laying on the pain. This allows you to stay even further away from your enemies while still dealing damage. If things are getting a bit close for comfort, take the proximity mines before getting to three dynamite just to guarantee hits and create defensive minefields. Either way you’ll want to stay in the lanes and push towers, only dealing with enemies when they’re there; don’t chase unless you bought the bull for some reason in the interest of saving your bacon. The lifesteal on Lonestar’s dynamite is pretty potent, but you won’t need it early on most likely; might as well just heal off of the neutral critters. You’ll want your health relatively early with this build, but you can save the boots for mid-game after the enemy’s outer towers have fallen. Second focus with this build is bull and damage if it’s a push war, or both missiles if you just need some extra bang to your kaboom.
Roudy Wrangler
This includes going all-in with the bull, and is incredibly annoying for the enemy team. Take the bull and damage early so you can properly defend your towers. For the record, this strategy is the way to go on AI Station 404 because you only have to defend one tower. Ideally you’ll pick this build when there’s an enemy Clunk, Voltar or Lonestar (at least two of the three means you almost have two) to stop the heavy pushing power. As the game progresses finish up the damage so you can start clearing entire droid waves with each bull, then take cooldown. You shouldn’t need the bigger bull until towers start falling, but if people are getting around the bull (like if the enemy team is very jumpy) go ahead and get the size earlier. Late game you’ll want to max dynamite to complement your boots and health upgrades. Get the proximity upgrade as soon as possible so you can have that added damage. Remember to throw the dynamite before you bull, no use throwing dynamite at a target that’s no longer in range. This strategy can win games that go on too long with relative ease, but it’s not worth dying in their base if you don’t win for it, you’re too valuable to be dead.
Dastardly Desperado
The Desperado focus is, of course, on the gun. Now we take missiles for this build for their early game dominance. When you take this build you’re going to be skirting battles, taking out weaker enemies from outside the thick of the battle. Take your boots early so you can give chase because the missiles don’t travel all that quickly. Ideally you’ll hide in bushes (on levels that have them) or descend from above onto unsuspecting enemies to lay on the hurt. Don’t worry about farming as much, try to level off of kills. Getting both missiles is relatively inexpensive, so if you find you need some more sustain, take dynamite with the lifesteal upgrade. If you’re having trouble finishing off targets, take the bull with the size upgrade so you can push enemies away from their escape routes, giving you extra time to lay on the hurt. You’ll finish up this row pretty quick, so if you’re having fun just chasing and killing, max your dynamite next; if the enemy is grouping up more due to your dastardly deeds, take the ride the bull straight into the enemy base!
When you’re losing…
Bull is always the way to go when you’re losing. It’s really that simple, go bull, go damage, go everything bull! Beyond that if you’re losing fights take proximity upgrades and lifesteal on your dynamite and pick up health from stray enemies, droids and neutral monsters while being chased. Or of course you can throw it back at your enemy’s face. Lonestar is great at escaping, especially with boots, so make sure you have them if you’re getting caught out there.
Variants
Tankstar – Tanking with Lonestar is strange, yes, but do-able! Build max health, regeneration, lifesteal dynamite with extra explosion size, and damage bull with the slow and increased size. This build is super annoying, just… Tankstar never dies! Knock enemies off you, heal off droids around you and waltz right into their base! It’s a good idea to build your health and regeneration first, so play defensively and farm up while you make enough money to get your bull and damage. From there, activate survivalist mode and win the game!


