Fez Cube Guide – Central Hub – 4, 8 and 16 Cube Doors (Zunu and Zu)
Fez isn’t all puzzles, jumping and shifting. There are things to be learned, tales to be told and doors to be opened. If you’re here at the Central Hub, then it must be story time.
We might as well go through these in numerical order, so we’ll start with the 4 Cube Door. Honestly we couldn’t think of a name for this place, and the game doesn’t give it one, so that’s what we’re calling it. Also… well, there really isn’t much here.
Well, that’s not true. However, this place is about story. There’s a lot of insight into various things about the game, so it’s worth going through. Also there are bits everywhere. Check every room, enjoy yourself. And no, there is no way to rotate each room, they’re locked for some reason.
That done, return to the Central Hub and let’s go through the 8 Cube Door, which we’ll call Zunu. Because that’s what it’s called.
Let me just make a quick editorializing comment, is not the music here amazing? It is, right? It’s amazing.
Okay moving on, against most of this area is just bits. Lots of bits, lots of rooms, and they’re all worth exploring. Zunu has a very interesting atmosphere to it, and pieces of it are, again, about the story. So do enjoy your time here.
We do, however, have a secret to solve here.
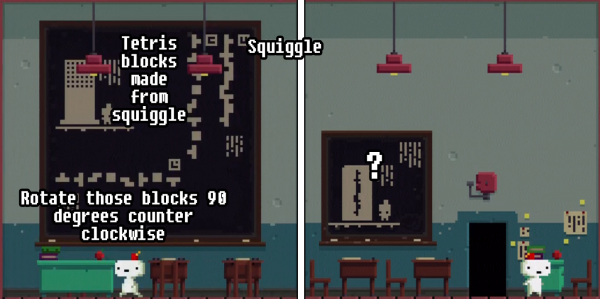
This room is full of Tetris blocks. Since it’s a school room it’s clear that something was to be learned about all these, but we’re not entirely sure what. One wall has a strange square made of blocks which we’ve seen before in the Boiler Room back in the Village. One wall has a strange six-block shape with two marks on the top. The other two walls, however, feature things that seem to be related. One is a guy standing next to one of those slabs we’ve seen before with a weird squiggle on it, and the other board has several weird shapes.
On the right, we see one big squiggle. Next to it we see that same squiggle seemingly broken up into Tetris pieces. On the bottom of the board, we see those same Tetris pieces laid out having been rotated 90* counter clockwise. The upper left has a little guy next to a big block with a bunch of dots on it, not sure what that means just yet.
What all that means, we don’t know, but we do know that these squiggles are composed of Tetris pieces and that when read vertically, must be rotated 90* counter clockwise.
We’re going to call this the Shift Cipher, but for now this is all the information we’ve got. Unless, of course, you can figure it out on your own.
Unfortunately, with just this amount of information we can’t solve the secret here, but the solution is in the SPOILER ZONE should you want it.
Other than that, you’re welcome to go enjoy the rest of Zunu, then return to the Central Hub.
We’ve got one last door to go through down here and this one requires 16 cubes. If you’re ready, and you should be, make your way through the door to Zu.
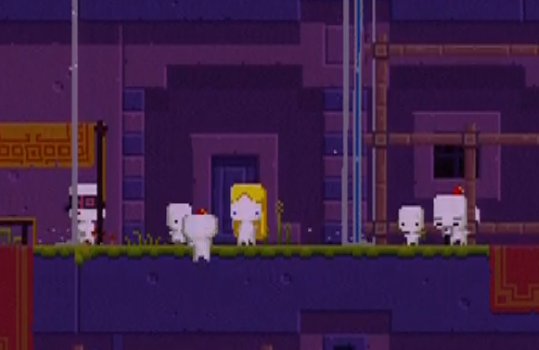
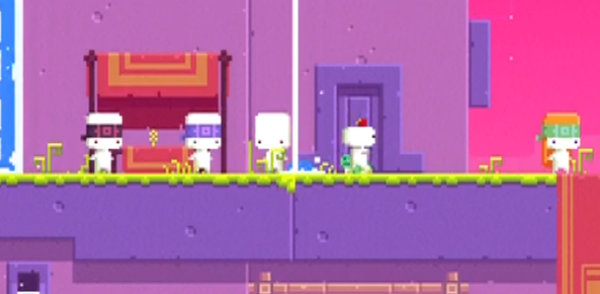
Welcome to Zu! First of all, OTHER PEOPLE! The world is not so lonely, huzzah! Why they have square heads and you have a strangle, rectangle head is unknown, but you can talk to them if you’d like. Understanding them, maybe not, depends on where you are in the game.
Moving on, there’s lots of bits here! All over the place, go get them all. Zu has some strange rooms though, that’s for sure. Go open all the doors, see all the things, and maybe, just maybe, solve yourself a major puzzle.
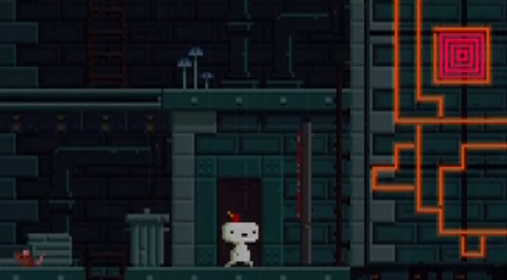
Before all that, you’ll note there’s a door which requires 32 cubes! That’s a lot, huh? We’ll come back here later, suffice to say it’s going at the way bottom of this page, and it’s linking to another page. Won’t be entering that here, and it won’t be in the spoiler zone, but we won’t tell you what it is. Just know that you have to come back to it before you can get everything out of this game.
Key – On to things you can do, there’s a key to get! Go through that door up there in the picture above and… well get the key. Ta-da.
Next up is a super duper important room, reminiscent of the one in Zunu. Why is that, you ask? Well because it’s another school room! This is a warning, as this school room does indeed have all that’s necessary to solve the Number System. There are more things you can use to help you solve it as this is an incredibly difficult code to crack if you’re not looking at it correctly. That said, you’re welcome to pass up on this opportunity as if you proceed further into the game, you may gain more insight into solving this cipher.
However, having completed the code and looking back on it, all the info is here. As such, we are going to explain the Number System and how you figure it out using the information found here. If you wish to solve it on your own, then there is nothing else for you to do here in Zu and you should proceed back to to the Main Hub and continue your exploration.
For those of you staying, incoming code solution.
Number System – The number system was a very difficult safe to crack until some key things shown in this room started to click. For one, by now you should know what the numbers 1 – 3 are. There have been several instances of all three, and frankly it’s tough to not assume what 1 is. However, figuring out the numbers beyond it is quite difficult, as is the system by which they are differentiated. Again, there are myriad ways to solve this cipher, but we’re going to only rely on the information found in this room.
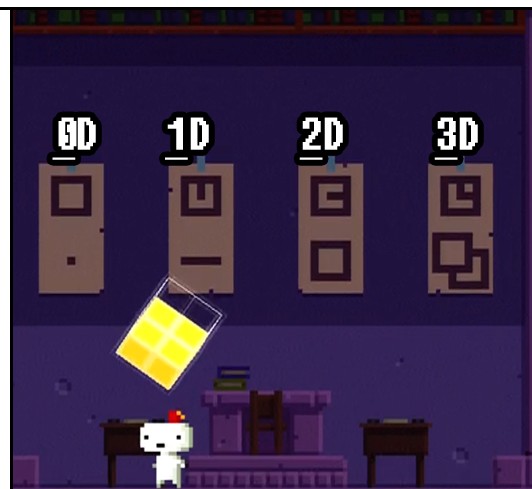
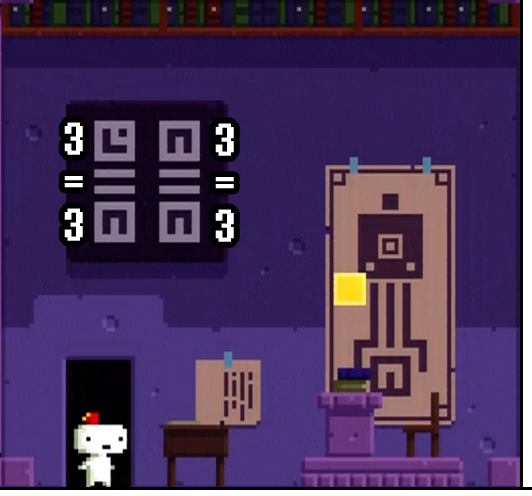
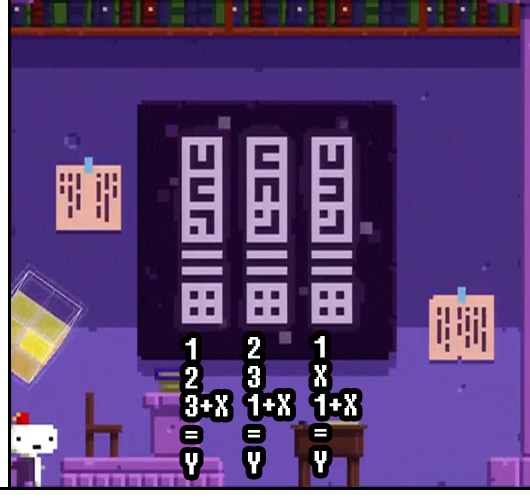
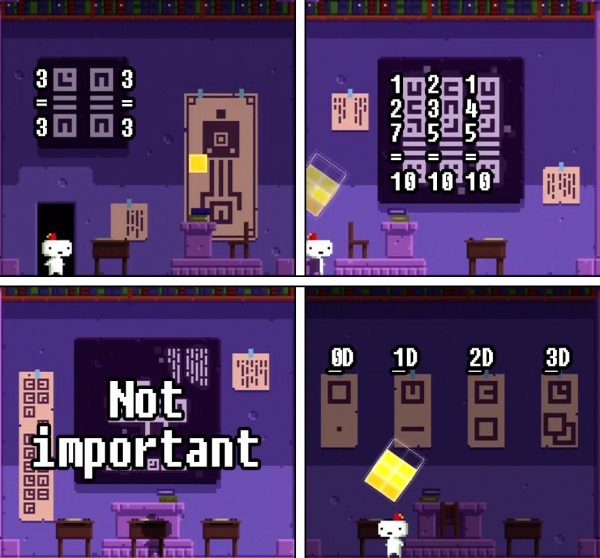
There are four walls in this room, each with some information. One wall has three strings of numbers which seem to be equations, one has two equivalencies, one has what appears to be a the make up of a die, and one has four papers with three numbers and four symbols.
We’ll start with the four pieces of paper. There’s a blank square with a dot below it; a square with a line at 12 o’clock with a line below it; a square with a line at 3 o’clock and a square below it; and a square with lines at 12 and 3 o’clock with two squares below it. What the heck does that mean?
Let’s see. Each of these papers attempts to establish a correlation between the numbers and the symbols below them. From that it’s safe to assume that this is already a count of 0 – 3, but it’s important to check. A dot is dimensionless, or “0D”. A line is one dimension, or “1D”. A square is two dimensions, or “2D”, and those double-squares which you may or may not have figured out mean cubes in this game represents “3D”. Thus, we ascertain that those numbers are 0, 1, 2 and 3 in that order.
So now we know 1 – 3! This is helpful. Match this against the treasure maps you’ve seen or any other times you remember the number symbols to be sure.
The next important area is the two equivalencies. We see the symbol we just figured is 3 = a square with a mark at 6 o’clock. Then, that same mark equals itself. Looks weird at first, but it establishes the idea that they must both be 3.
Let’s recap. A mark pointing up is 1, a mark to the right is 2, and a mark pointing down is 3. However, a mark pointing up (1) and a mark pointing right (2) is also 3. So, adding the two marks means 3, but also just the down-facing mark itself means 3. This idea is the key to figuring out the entire system. Each mark is a number, but the numbers can be combined to form larger numbers.
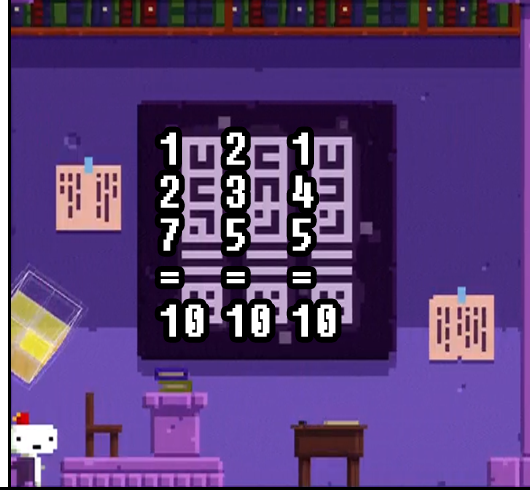
In the final page we see three equations:
– 1 + 2 + (3 + X) = Y
– 2 + 3 + (1 + X) = Y
– 1 + X + (1 +X) = Y
Now, we have no idea if this system goes to 10 or to 9 at this point, as there is a symbol for zero. So we can’t do this just by looking at it. Or we can, but instead we’re going to use math and logic. Let’s Algebra up some of these equations and simplify them. Here’s what we’ve got:
– 3 + (3 + X) = Y
– 5 + (1 + X) = Y
– 1 + X + (1 +X) = Y
Intense, right? Sort of, but moreover we’ve found something!
– 5 + (1+X) = Y and…
– 1 + X + (1+X) = Y…
are the same. That means that 5 = (1 + X). If that’s the can deduce that X = 4! Huzzah, huzzah!
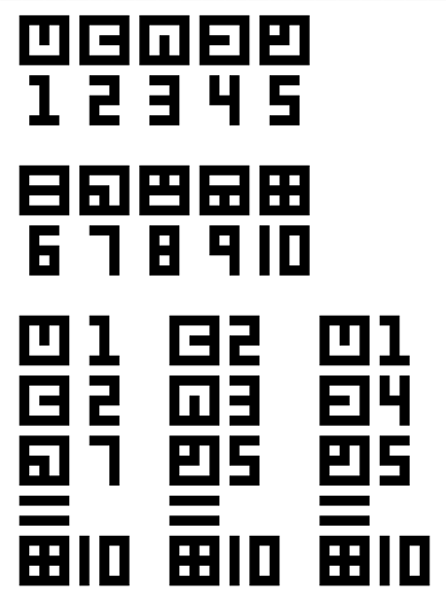
So, while you may have figured this out on your own by making assumptions (which is fair), we’ve solved it all with math. Each mark represents 1, 2, 3 or 4. Adding the marks adds their value. As most 1st graders know, 1 + 2 + 3 + 4 = 10. The symbol with all four marks in it is 10. Each number is any combination or permutation of the combined marks. An up mark (1) and a right mark (2) is 3, but a down mark is 3 also. An up mark and a left mark (4) is 5, but a right mark (2) and a down mark (3) is also 5.
Thus we’ve deciphered the Number System. Congratulations if you figured it out on your own, or perhaps most of it, or even just enough of it, but hopefully the logic here is airtight for you. If you don’t know Algebra, then… sorry.
You’re done here now, hope your brain is okay. Head on back to the Main Hub unless you’ve got 32 cubes. If you do, head over to this page.
Here’s a cheat sheet for the numbers, but remember all you really need is 1 – 4 and the ability to add:
Continue your journey wherever you please:
– To Sewers
– To Industrial Zone
– To Mausoleum
– To Main Hub
– To Observatory
!! – SPOILER ZONE – !!
It’s time for more spoilers! Woo hoo! There’s only one secret in all of Zunu that requires solving and it’s really not that difficult once you’ve figured out the code with which you decipher it. Head on back to the school room and we’ll get started.
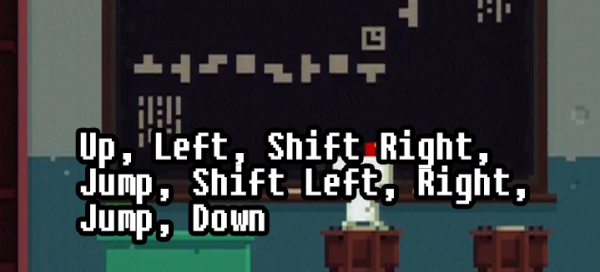
Shift Cipher Anti-Cube – Head on into the school room and rotate until you’ve got the blackboard with the instructions used to figure out the Shift Cipher. Not too tough to find, and not too tough to decipher. Bust out your pencil or whatever it is you use to write these things down, or just read out solution. Here’s the code:
Up, Left, Shift Right, Jump, Shift Left, Right, Jump, Down
That finishes up Zunu for us! Time to move back to the Main Hub.

